Pages

May 27, 2012

HH Chickpea Tacos

One of the most inspiring websites/blogs I found in the early days of becoming plant-based was Happy Herbivore. Since then I follow the blog daily and I also have both of Lindsay's cookbooks. One of the recipes that I've been thinking of trying for a long time and I haven't gotten around to, until now, is Chickpea Tacos. I made it today and boy - do I regret not having made It before. I usually have all the ingredients on hand - which happens to be the best part about the HH recipes and both cookbooks - simple recipes with simple ingredients. 


Prep Time:  15 min. 
Ingredients: See Chickpea Tacos


Directions: I followed the recipe as written, with the exception that I made the chickpeas in a skillet. I lined the skillet with water, added all the ingredients and kept it going until the water was almost dry. The blog recipe uses taco seasoning, but the recipe in the HHC book asks for individual components of taco seasoning - one of which is granulated onions. That's what you see in the picture below. Also, I used whole wheat tortillas and made soft tacos, instead of using shells.

My Assessment: A++

May 26, 2012

Veggie Fact of the Day


Taro is a plant native to southeast Asia. It is grown for its edible shoots (corms; short, vertical, swollen underground plant stem that serves as a storage organ) and large green leaves (commonly known as 'Elephant Ears'). 

Neither the corms, nor the leaves are edible when raw due to the presence of calcium oxalate crystals (raphides), which are highly insoluble and have been shown to contribute to kidney stones. Eating these can cause intense sensations of burning in the mouth and throat, swelling, and even choking. However, the corm and the leaves are completely safe once cooked properly and are eaten across the world without adverse effects. 

Taro is also known as Colocasia, Arvee or Arbi, it is thought to have originated in Eastern India and Bangladesh. Once steamed, baked, roasted or boiled, the corms take on a light pink or purple color due to phenolic pigments and a sweet nutty flavor. Nutritionally, the corms are very rich in complex carbohydrates, low in protein and fats and lack gluten. Taro is superbly easy to digest and is often used as a baby food. In Hawaii and other polynesian islands, Taro is commonly consumed as a staple in the form of Poi - which is produced by mashing the cooked corm (baked or steamed) until it is a highly viscous fluid. Taro is one of finest sources of dietary fibers. The leaves are rich in flavonoids such carotenes, and cryptoxanthin and Vitamin A. Both the corm and leaves are moderately rich in Vitamins B-Complex group - Pyridoxine (B6), Folic acid (B9), riboflavin (B2), Pantothenic acid (B5), and thiamin (B1) and minerals like zinc, magnesium, copper, iron, manganese and potassium.

Taro Chips

Seems to me like its harder and harder to find new vegetables and other plant derived products to satisfy my New Veggie Quest. I don't think its because of lack of trying or because of a dirth of new things to try - cause there is a rather vast list of things that I have yet to try (Wikipedia List of Culinary Vegetables). I think my big problem is that I live in rural America and some of the exotic, or seasonal varieties have not crossed paths with me ye. Anyhow, on my quarterly visit to the Indian store to stock up on spices and other things that are best found there, I did come across New Veggie #30 - Taro. In India, taro (Arbi) is used throughout almost every state and made into a variety of traditional curried and fried dishes. This is the first time I have cooked it myself and hence it gets the honor of being Veggie #30.  


Prep Time: 30-40 min, with pre-steamed Taro

Ingredients:
  1. 2-4 medium Taro corms, steamed and sliced. 
  2. 3-4 tbsp whole wheat flour
  3. 1/2 cup Non-Dairy Milk
  4. 1 tsp Turmeric
  5. 1 tsp Cumin powder
  6. 1 tsp Roasted cumin powder
  7. 1 tsp Coriander powder
  8. 1 tsp Garam Masala
  9. 1-2 tsp Amchoor (Dried Mango powder)
  10. 1 tsp chili powder (optional)
  11. 1-2 tsp  red chili flakes (optional)
  12. Salt and Pepper, to taste
  13. Lemon/Lime juice 
  14. Pam, or other Cooking Spray 
Directions:
Under running water, and using a vegetable brush, or scrub pad, remove all dirt and hair from the exterior of each corm. Place in a pressure cooker, or stock pot and cover completely with water. Add 1 tbsp salt to the water, and steam until the corms are fork tender. Allow to cool and then peal the skins. Refrigerate overnight, or until use. 


In a shallow dish, mix flour and all dry spices together. 


In another shallow dish, add the soy milk and dip each slices of Taro in the milk


Next transfer each milk soaked slice into the flour spice mix and coat it thoroughly with the mix.


Prepare a cookie sheet by spraying with Pam and set each coated slice on the sheet, in a single layer.


Spray the top of the slices with Pam and broil on high for 5-7 minutes on each side until golden brown. 


Sprinkle the slices with lemon/lime juice and chaat masala and serve with hot sauce and fresh basil leaves. 

My Assessment: I liked it, but didn't love it. I know the reason why. Taro is one of those vegetables that likes oil. Traditionally, these slices would be deep fried and I tried to keep my recipe low-fat. But I ate the crispy slices with fresh basil leaves and that was just awesome!! It added a fresh crunch and I loved the soothing minty flavor of basil with the hot sauce and chili powder.

May 25, 2012

TVP & Onion Rice

One of all my all time favorite foods growing up, even though I was a meat-eater until recently, was Soy (TVP) Chunks sold under the brand name Nutrela in India. Its coming to be the end of the week and I didn't have too many fresh veggies in the house and I wasn't really in the mood to stop at the store on my way home, with my 3-year old in tow. So I decide to go back to the old favorite.


Prep Time: 30 min

Ingredients:

  1. 1/2 cup Basmati Rice
  2. 1 large Onion, sliced
  3. 1 can (14 oz) of Hunt's Diced Fire Roasted Tomatoes
  4. 2 cloves of Garlic, diced
  5. 1/2 cup Nutrela (TVP) Large Chunks
  6. 1/2 tsp Cumin
  7. 2 tsp Cumin powder
  8. 2 tsp Coriander powder
  9. 2-3 tsp Garam Masala
  10. Salt & Pepper, to taste
  11. Fresh Coriander leaves
Directions:
Line a deep pan with water, add garlic and onions and cook until onions are translucent. Rinse TVP under running water to get rid of any dust (I use a mesh colander) and then add to the pan. Bring to a boil and cook on a simmer for 3-5 minutes. Add the tomatoes and all the spices. Mix well. Once the mix is almost dry again, rinse rice in running water as well and add to the pan. Add 1.5-2x the amount of water (as rice) and bring to a rolling boil. Reduce heat to a medium low, and cover partially. Cook until rice is tender (about 10-12 min). Garnish with fresh cilantro leaves and serve hot. 

May 22, 2012

Mushroom & Barley Stew (Take 2)

So last week when i posted pics of my Mushroom & Barley stew, one of our friends commented that it wasn't a stew because the pics didn't look soupy enough :) .... well, it was soupy, but more on the dry side. So I decided to make it again, with modifications of course, and for Jeanne, I made it soupy too!! 

Mushroom & Barley Stew, Take 2.
Prep Time: 20 min  

Ingredients:
  1. 1/2 cup barley (New Veggie #29)  
  2. 1/2 cup Bob's Red Mill TVP crumbles (optional; use additional 1/2 cup barley instead).
  3. 3 cups of vegetable broth, and more, as needed. 
  4. 8-10 large mushrooms, sliced.
  5. 4-6 stalks of celery, diced.
  6. 4-5 Slices of Field Roast Wild Mushroom Deli Slices, diced. (optional; Substitute with Italian sausage crumbles)
  7. 1 cup of sliced fresh/frozen carrots.
  8. Garlic salt, to taste.
  9. 2-5 fresh Basil leaves, sliced.
  10. 5-7 fresh Oregano leaves, whole.
  11. Freshly cracked black pepper, to taste. 
Directions:
Cook barley according to package instructions in advance, or use instant barley for this recipe. In a deep sauce pot, add vegetable broth and barley and bring to a boil. Reduce heat to a simmer. Meanwhile slice mushrooms and celery and add to the pot. Continue to simmer. Next add the wild mushroom deli slices (or sausage crumbles) and continue to simmer. Add more broth as needed, to keep a good soupy consistency. Lastly add carrots, and herbs and simmer for an additional 5 minutes. Garnish with a sprig of basil and freshly cracked pepper. Serve steamy hot!! 


My Assessment: Still LOVE barley! I love the nutty, very slightly chewy flavor of barley. I highly recommend that everyone try it at least once. The inclusion of celery and carrots added a whole other dimension to this soup. Um Um Good!!  

May 17, 2012

Mushroom & Barley Stew

So while it is not a true veggie but a grain, New Veggie #29 is Barley. I can honestly say that I have never before tried Barley, in any form except brewed :) !!  
Mushroom & Barley Stew
Prep Time: 20-30 min

Ingredients:
  1. 1/3 cup barley, cooked according to package instructions
  2. 1 cup vegetable broth
  3. 1 medium/large Red onion, diced
  4. 6-8 Mushrooms, sliced
  5. 2 Field Roast Vegan Sausage Links, sliced/crumbled
  6. 1 tbsp Garlic
  7. Salt, and pepper, to taste
  8. 2-5 fresh basil leaves, finely diced
Directions
Line a skillet with vegetable broth and add garlic and onions. Cook until tender. Meanwhile dice mushrooms and add to the skillet as well. Once mushrooms reduce mix in vegan sausage and mix well. Then add barley, toss well, and top off with barley and freshly diced basil leaves. When done, the dish should be the consistency of a thick soup or stew. 


My Assessment: For having tried barley for the first time, I really really liked it. It gave the stew a hearty flavor - and the nuttiness of the barley made it chewy enough that I didn't even feel the need for bread with it. Overall, a good recipe and a great grain ... !!    

Veggie Fact of the Day


Barley is a major cereal grain, a member of the grass family. It is used primarily as animal fodder, a source of fermentable material for beer and certain distilled beverages, and as a component of various health foods, although it does contain gluten. 

Nutritionally, it is a wonderful cereal with eight essential amino acids. Whole grain barley (dehulled barley) still has its bran and germ and is a high-fiber, high protein grain. 

Pearl barley is dehulled barley which has been steam processed further to remove the bran, and is of course less nutritious compared to whole grain. When cooked, barley has a chewy texture and nutty flavor, similar to brown rice.

May 14, 2012

Veggie Fact of the Day


Okra, also known as 'lady fingers' is a highly nutritious green edible pod. It belongs to the same family of plants as cotton and the lovely Hibiscus - the state flower of Hawaii. It is low in calories (1 cup of raw okra equals only about 30 calories). And it has a whopping amount of Vitamin K in that same cup. Vitamin K is a co-factor for blood clotting enzymes and is required for strengthening of bones. Other vitamins include A, C and a wide variety of Bs (Thiamin (B1), Niacin (B3), Pantothenic acid (B5), Pyridoxine (B6) and Folate (B9). It has no saturated fats, or cholesterol. It is a rich source of dietary fiber, and minerals such as iron, calcium, manganese and magnesium. Its pods also contain flavonoid anti-oxidants such as beta carotenes, xanthin and lutein. And the funnest fact of all? My husband won't eat okra because it reminds him of Christmas ornaments this old lady at his church used to make .... !! So they do have multiple uses!! :)

Okra should be harvested when it is still tender and when the pods are crisp and plump. In the US, most okra available in stores is way past that stage and is often 'too' fibrous. The best test of the freshness of Okra is to see if the tip breaks of crisply. If the tip bends but doesn't break - its way past its prime. Interestingly, mature okra pods are used to make rope and paper!! So go for the fresh tender pods :)

Handling Okra: One thing I remember about eating Okra as a child was the anticipation. Even once the pods were home, it would be a while before the food was brought to the table. The pods were washed well in fresh cold tap water. Then, mom would spread them out in a single layer on a kitchen towel overnight. The next morning, she would carefully wipe down each one to get rid of any residual moisture. That in itself is the biggest trick. Interaction with water, or any liquid for that matter, is what makes okra slimy. But this mucilage has been shown to have cholesterol-binding properties. So don't pass it by. Here are a few tips to reduce the sliminess of Okra. (a) Always dry the pods well before slicing. (b) After its been sliced, do not add it to the dish until the very end, and once added, minimize mixing/tossing as much as possible. (c) Sauteing or shallow fry okra cauterizes the cut ends and reduces slime. However, this method uses a LOT of oil. (d) Unless its really necessary, don't cut okra in very small pieces and lastly (e) sour ingredients cut down on the slime. In India, recipes with okra often call for tamarind paste, dried mango powder or lemon juice.


Oven Baked Okra

So I'm going to cheat today :) and bring in a previously tried vegetable into the mix as New Veggie #28. I can safely and very honestly say that Okra is one of my all time favorite vegetables.

I grew up eating Okra & Roti and can probably eat it everyday and not live to regret it. However, the downside of it being an old favorite and almost a comfort food for me is that the only way I ever eaten it is as Bhindi Masala - which is a staple on the menu of Indian restaurants across the world and a quick Google search reveals pages upon pages of recipes for Bhindi Masala.

While I love that preparation, I have to admit that it tastes best back home in India. But No! Its not all nostalgia! In my opinion, and I speak of over a billion Indians, Okra should be harvested when it is still tender and when the pods are crisp and plump. In the US, most okra available in stores is way past that stage and is often 'too' fibrous.  The best test of the freshness of Okra is to see if the tip breaks of crisply. If the tip bends but doesn't break - its way past its prime. Interestingly, mature okra pods are used to make rope and paper!! So go for the fresh tender pods :)

So while I've cheated in selecting Okra as New Veggie #28 - I'm actually trying out a brand new recipe with it. Because Bhindi Masala is also a dish that uses rather generous amounts of oil, this is also an attempt at reducing the amount of oil used. I only used enough cooking spray to grease the cookie sheet.  

Handling Okra: One thing I remember about eating Okra as a child was the anticipation. Even once the pods were home, it would be a while before the food was brought to the table. The pods were washed well in fresh cold tap water. Then, mom would spread them out in a single layer on a kitchen towel overnight. The next morning, she would carefully wipe down each one to get rid of any residual moisture. That in itself is the biggest trick. Interaction with water, or any liquid for that matter, is what makes okra slimy. But this  mucilage has been shown to have cholesterol-binding properties. So don't pass it by. Here are a few tips to reduce the sliminess of Okra.  (a) Always dry the pods well before slicing. (b) After its been sliced, do not add it to the dish until the very end, and once added, minimize mixing/tossing as much as possible. (c) Sauteing or shallow fry okra cauterizes the cut ends and reduces slime. However, this method uses a LOT of oil. (d) Unless its really necessary, don't cut okra in very small pieces and lastly (e) sour ingredients cut down on the slime. In India, recipes with okra often call for tamarind paste, dried mango powder or lemon juice.

Prep Time: 30-40 min

Ingredients
  1. 2 cups fresh Okra pods, washed and dried well.
  2. 2 tbsp Chickpea flour
  3. 1/2 tsp Turmeric powder
  4. 1 tsp Chili powder
  5. 2 tsp Garam Masala
  6. 1 tsp Cumin powder
  7. 2 tbsp Coriander powder
  8. Salt, to taste
  9. Freshly cracked black pepper
  10. Lime juice, to taste
Directions
Preheat oven to 375F. Prepare a cookie sheet by spraying a thin film of cooking spray. 


Next, wipe each Okra pod with a dry paper towel; trim tips and stalks of each pod. 


Slice each pod lengthwise and transfer to a dry mixing bowl. 


Mix all the dry spices together in a small bowl and then sprinkle half over the slice okra.


Let sit for a couple of minutes and then add the rest of the dry spices. This allows any mucilage to be absorbed before you add the second helping of dry flour and spices. 


Spread the okra slices in a single layer on the prepared cookie sheet. Bake uncovered for 15 min; then toss once and bake for another 5 minutes until the pods appear slightly wilted.  


Then, for the last 3-4 minutes, turn on the broiler on Low to add some extra 'crisp' !! & Voila ... !! 


Serving Suggestion: Sprinkle with some lemon/lime juice and serve with hot sauce. I think I died and went to heaven!! This was so good!! I ate it all :-) 

May 9, 2012

South Indian Upma

One of my favorite snack foods growing up was South Indian Upma. My mom would most often make it for breakfast, which is when it is traditionally eaten, and then occasionally she would make it as an evening snack. To me, it is almost a comfort food. It reminds me of lazy weekend afternoons at home with the lovely aroma of sizzling mustard seeds and curry leaves. I didn't get a very good picture today but the taste and aroma was just wonderful. 


Prep Time: 20 minutes

Ingredients:
  1. 1/2 cup Sooji (semolina).
  2. 1/3 cup fine rice vermicelli, dry, crushed 
  3. 1 tsp butter
  4. 1 tsp mustard seeds
  5. 8-10 green onions/Scallions, sliced longitudinally.
  6. 1/2 cup frozen peas
  7. 1 medium tomato, diced into chunks. 
  8. 4-6 dried curry leaves
  9. 6-9 cilantro leaves
  10. 1/2 tsp chilli powder
  11. salt to taste
Directions:
In a dry skillet, on medium heat, roast semolina and crushed rice vermicelli until deep golden brown (about 5-7 minutes). In the center of the skillet, open up a spot by moving the roasted dry semolina and vermicelli to the side. Add the butter and mustard seeds. Once the seeds begin to pop, mix into the roasted semolina and then add green onions, frozen peas and tomato. Sprinkle with salt and roast everything for another few minutes until all peas are thawed and the water from the tomatoes is evoporated. Mix in dried curry and fresh cilantro leaves and chilli powder. Mix well. Then add 1/2-2/3 cup of cold water. This will quench the heat and stop the roasting process, but will also release aromas from all the spices, and will also help the roasted semolina to puff up and cook completely. I like my Upma to be creamy and the consistency of oatmeal. Some people prefer it to be flaky, for which you should simply use less water.

My Assessment: A+++

May 8, 2012

Spinach, Lentils, Mushrooms & Wild Rice Risotto

I was itching for a one pan recipe tonight. I knew it had to be some sort of grain, with veggies and maybe some lentils to make it worth my while ... !! I also got some Barley the other day and had been wanting to use it. So this evening's research yielded a rather interesting recipe - Barley and Lentil Pilaf with Mushrooms & Spinach. Now that seemed like the perfect thing to make tonight and I was looking forward to trying barley .. except, I caught sight of a packet of Near East Long Grain and Wild Rice Pilaf, which has been sitting in my pantry for a while ... so quite serendipitously my plans for a barley and lentil pilaf turned into a risotto. I used the same recipe, only I used rice instead of Barley and green lentils instead of brown. 


Prep Time: 20-25 min

Ingredients:
  1. 1 Pack of Near East Long Grain and Wild Rice Pilaf
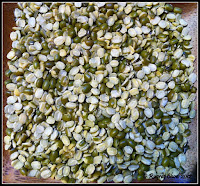
  2. 1/3 cup Split Mung dal (Green lentils)
  3. 2 sachets of Swanson Vegetable Flavor boost 
  4. 1 cup water
  5. 1 small Red onion, diced
  6. 1 cup baby spinach
  7. 4-6 large mushrooms, sliced  
  8. 1 tbsp pine nuts
  9. Salt and pepper, to taste
  10. 1 tsp fresh Thyme leaves. 

Directions:
Line a dutch oven, or deep (non-stick) stock pot with half cup of water and mix in both sachets of flavor boost. These are small sachets of concentrated broth, that can be stored at room temperature. I like using these because I can use one, or more, depending upon my recipe, and I don't need to worry about the rest of the carton of broth going bad in the fridge. Once the water comes to a boil and the flavor boost paste is mixed in, add dal and allow to simmer for 5-7 minutes while preparing everything else. Then, mix in the packet of rice, with provided seasonings. I did not use any oil for the rice.  


Turn the heat to medium low and let rice and dal simmer. Dice onions and add to the pot. Mix in and let simmer. Then add baby spinach, sliced mushrooms and pine nuts and continue to let it simmer until the rice and dal and both tender. If it begins to look a little dry, add a splash of water, as many times as needed. Given the slightly grainy nutty texture of the dal, the final dish should be a very moist, almost runny risotto, not a dry pilaf. I found that if you let it get too dry it doesn't taste as good. Once both the rice and dal are tender, add the thyme leaves, mix in, cover and let sit for 5 minutes to allow the flavors to meld together. Serve garnished with freshly cracked black pepper.    

My Assessment: I liked it .. and the best part, its a one-pot dinner, with enough leftovers for lunch too! My picture looks a little dry and not as moist as it should. My dinner sat for a few minutes while I ran around after Nik :) .. oh well! Life as a mom!! 

Herb & Spice Fact of the Day


Having nightmares? Place a little thyme under your pillow for a restful night! Thyme has been used for healing, good health, and cleansing. The ancient Egyptians used thyme in the mummification process. The ancient Greeks sprinkled thyme in their baths and used it on bandages to prevent infection. The ancient Romans used thyme in the treatment of depression. Thyme was also placed in coffins to ensure passage to the next world. Needless to say, thyme is packed with numerous health benefiting phytonutrients (plant derived compounds), minerals and vitamins that have made it so popular since ancient times. 

The essential oil, Thymol, is the main ingredients in thyme and it has been shown to have antiseptic and anti-fungal properties. Other volatile oils in thyme include carvacolo, borneol and geraniol. It also contains flavonoids and Phenolic antioxidants like zeaxanthin, lutein, pigenin, naringenin, luteolin, and thymonin. Fresh thyme has one of the highest antioxidant levels among culinary herbs. 

Thyme also is a rich source of B-complex vitamins, beta carotene, vitamin A, vitamin K, vitamin E, vitamin C and folic acid (Vitamin B9). There are more than a 100 varieties of thyme and each one has a slightly distinct taste. In general, thyme has a slightly pungent, spicy, clove-like flavor. It has a strong flavor, so a little bit goes a long way.

May 7, 2012

Artichokes in Garlic Basil Cream Sauce

After an almost 3 week hiatus, I'm back on the 'New Veggie' wagon and the latest honoree and New Veggie #27 is the mighty Artichoke. After years and years of only eating Spinach and Artichoke dip in restaurants, I decided to give this beautiful vegetable a try at home.  


Prep Time: 20 min

Ingredients:
  1. 1 medium Artichoke
  2. 1/4 cup Soy milk
  3. 1 tbsp minced garlic
  4. 1 tbsp minced dried onion flakes
  5. 8-10 mushrooms, quartered.
  6. 5-6 fresh Basil leaves, finely diced
  7. Salt and freshly cracked pepper, to taste. 
Cleaning and Preparing Artichokes:
The most interesting fact I learnt about artichokes - when you're buying one, try pressing the bulb together, and it should talk to you :) !! The leaves squeak when they rub together and that is a good sign that it is a fresh bulb. To prepare it for cooking, wash the artichoke under cold running water, turn it upside down and give it a good shake to get rid of excess water; then dry it with a clean towel. Using a sharp Chef's knife, cut off the top inch of the artichoke - the portion where the leaves are tightly bunched together. Then, using a pair of kitchen scissors, cut off the sharp points from the remaining leaves. Now cut the bulb into quarters and scoop out all the purple leaves and the "hairs" that cover the artichoke heart. A paring knife works best at this point. Keep a bowl of water (with the juice of half a lemon) handy and as you clean up each piece, drop the cleaned pieces in it to prevents the artichokes from discoloration - which happens quite quickly upon exposure to air. Remove as many of the tough leaves - the easiest way is to simply grab each leaf, starting with the outermost and pulling downward towards the stem. Once the inner pale leaves are exposed, you're ready to do the final touch up. Use the paring knife remove any hard portions near the stem. Cut off the stem and wash well to remove any hairs clinging to the heart. I cut my artichoke into 8 wedges this evening.

Directions
Line a skillet with soy milk and add minced garlic and onion. Saute garlic for a couple of minutes and then add artichoke wedges, toss well, cover and cook for about 10 minutes until the leaves are nice and tender.  Add another splash of soy milk, as needed, if it begins to look dry. Add mushrooms (any kind, I used baby bellas this evening). Cook for a couple of minutes until the mushrooms warm up. I don't typically like to cook down mushrooms as I like the meaty texture of mushrooms. After a couple of minutes, add freshly diced basil, toss well and serve over warm couscous. The dish should be very moist with the soy milk almost all evaporated to a creamy texture. 


My Assessment: I really really enjoyed dinner today. I loved the creamy goodness of soymilk on the artichoke and the garlic really added to the flavor as well. This was like eating artichoke dip, without any of the high calorie ingredients in the restaurant variety. Next time, I might make this with baby spinach instead of mushrooms to see if how close I can get to the restaurant style Spinach and artichoke dip. One lesson learnt - do not be frugal about removing the outermost tough leaves. I left a few that should have been removed and they were really tough to eat. In the end I didn't eat them, and they increased my cook time as well. 

My Herb Garden
Today was also the first time I used herbs out of my own little herb garden. I started it 2 weeks ago and now that it has had a chance to establish its roots a little bit, I took my first harvest. 

Veggie Fact of the Day

Artichokes are one of the oldest foods known to man. Zeus was said to have turned a scorned lover into an artichoke. They are native to the Mediterranean and were brought to the US in the 19th century by French and Spanish immigrants. Today, California is known as the Artichoke Capital of the World, with Castroville, CA calling itself the Artichoke Center of the World. In 1948, Marilyn Monroe (then Norma Jean) was crowned Castroville's 1st "Artichoke Queen." Interestingly, the artichoke, a flower, is said to be an aphrodisiac and because of this, women were prohibited from eating it until the 16th century, in many countries. Luckily for us, women can now freely consume artichokes and benefit from its lovely properties ;) - along with being an aphrodisiac, it is also known to be hepatoprotective, anticarcinogenic, antioxidative, antibacterial, and even has some anti-viral properties. Virtually fat-free, the artichoke weighs in at 25 calories (per medium artichoke) and is low in sodium. It is also a significant source of Vitamin C, folic acid (Vitamin B9) and magnesium, and like other plant based foods, rich in dietary fiber.


Cleaning and Preparing ArtichokesThe most interesting fact I learnt about artichokes - when you're buying one, try pressing the bulb together, and it should talk to you :) !! The leaves squeak when they rub together and that is a good sign that it is a fresh bulb. To prepare it for cooking, wash the artichoke under cold running water, turn it upside down and give it a good shake to get rid of excess water; then dry it with a clean towel. Using a sharp Chef's knife, cut off the top inch of the artichoke - the portion where the leaves are tightly bunched together. Then, using a pair of kitchen scissors, cut off the sharp points from the remaining leaves. Now cut the bulb into quarters and scoop out all the purple leaves and the "hairs" that cover the artichoke heart. A paring knife works best at this point. Keep a bowl of water (with the juice of half a lemon) handy and as you clean up each piece, drop the cleaned pieces in it to prevents the artichokes from discoloration - which happens quite quickly upon exposure to air. Remove as many of the tough leaves - the easiest way is to simply grab each leaf, starting with the outermost and pulling downward towards the stem. Once the inner pale leaves are exposed, you're ready to do the final touch up. Use the paring knife remove any hard portions near the stem. Cut off the stem and wash well to remove any hairs clinging to the heart. I cut my artichoke into 8 wedges this evening.

Herb & Spice Fact of the Day


Basil known often as the king among herbs, is one of the oldest and most popular culinary herbs. 

It belongs to the genus: Ocimum and is a highly revered as a "holy herb" in many traditions all over the world, including India. There is a potted Tulsi (Ocinum sanctum) in every Hindu household in India and women across the country start the day by watering it and including it in their daily prayers. Basil grows best in warm, tropical climates. The leaves are light green, silky, about 2.5 inches long and 1 inch wide. 

There are several differnt varieties of Basil. The "Mediterranean" cultivar is typically called sweet basil, has light green leaves as opposed to "Asian basil" (Ocinum sanctum) that has large, hairy stems and stalks with pink flowers, purple or red leaves and has stronger ‘clove’ like flavor. There is also lemon basil, which has "lemon" flavor. Thai basil (O. basilicum 'Horapha') is similar in characteristics to Asian basil but features narrow, pointed, light green color leaves with a sweet licorice aroma. 

Basil leaves contain polyphenolic flavonoids like orientin and vicenin, which have anti-oxidant properties, essential oils such as eugenol, citronellol, linalool, citral, limonene and terpineol, which have anti-inflammatory and anti-bacterial properties. Basil leaves contain exceptionally high levels of beta-carotene, vitamin A, cryptoxanthin, lutein and zeaxanthin, which are all protective antioxidants that help fight various disease process. In India, basil leaves are often mixed in tea to protect against the common cold, flu, seasonal allergies etc. It imparts an aromatic flavor to the tea. All in all, Basil deserves its title of King among herbs. Basil has a slightly sweet peppery flavor, with a delicate menthol/minty aroma.