Showing posts with label H2 - Thyme. Show all posts

September 16, 2012

Basic Vegetarian Gumbo

.. the aromas of good ol' Creole cooking always make me smile. Andouille sausage was probably one of favorite meats before I went plant based. I don't miss the meat, but I do sometimes miss the flavors. A good hearty Gumbo is a good way to remember those flavors all over again. A lot of vegan/vegetarian gumbo recipes that are available online use vegan sausage and while I am sure that would taste good, those products are also extremely greasy and processed. Instead of sausage, I tried TVP chunks, with Cajun seasoning and .. my current best friend in a bottle - LIQUID SMOKE :) !!!  

Vegetarian Gumbo
Prep Time: 30 min

Ingredients: 
  1. 4 or 5 cups vegetable broth
  2. 1 medium to large Red Onion, diced
  3. 3 stalks of Celery, diced
  4. 1 tbsp minced Garlic
  5. 2 cups of Spinach, stems removed
  6. 1 cup white button mushrooms, quartered
  7. 1 cup Baby Carrots
  8. 1 12-oz bag of Frozen Diced Okra
  9. 1/2 cup TVP Chunks
  10. 2 tbsp Liquid Smoke
  11. 2-3 tbsp Corn Starch, as needed. 
  12. 1-2 tbsp Creole/Cajun Seasoning, to taste
  13. 2 tsp of fresh Thyme leaves
  14. Salt and Pepper, to taste
Directions: 
In a deep stock pot on medium heat, bring 4 cups of vegetable broth to a rolling boil. You can use water instead, but vegetable broth tends to add a lot more flavor. As the broth boils, add ingredients one by one, making sure that the liquid continues to boil during this process. Add onions and garlic, then okra, then spinach, mushrooms and baby carrots. Lastly rinse the TVP chunks in running water and add those as well. Reduce heat to a simmer, and boil for another 10 minutes or so. I used spinach today instead of green bell peppers which are more traditional to Gumbo, so feel free to use those instead. After about 10 minutes of simmering the soup, mix cornstarch in tap water and add in small amounts until the consistency thickens (but don't let it congeal). Add liquid smoke and cajun seasoning, mix well, seasoning with thyme and freshly cracked black pepper. Serve over brown rice. 


My Assessment: From what I've read, you need to boil the gumbo for at least an hour to get rid of the sliminess of the okra. From what I know of okra, it tends to get slimier as you cook it more. I only boiled this soup for about 25 minutes, including the time after I added corn starch. I don't mind the slightly sticky flavor of it, but if you do, try boiling it longer. Overall, I really liked this recipe. No added fat, very low on salt and very high on a lot of flavor. I love Creole seasoning :) 


June 23, 2012

Rutabaga Dijonnaise

Rutabaga has been on my list of possible new veggies to try since the very beginning. Somehow I have managed to shy away from it for this long, because it is a relative of the dreaded Turnip! Growing up, I absolutely hated everything about turnips - the smell, the texture, the flavor. I missed Norman's Farmers Market this weekend due to prior commitments and a special trip to Whole Foods Market. So, I decided that I needed to find something at WFM to satisfy my New Veggie Quest .... and lo & behold .. a big pile of Rutabaga was staring me in the face. And so, Rutabaga became New Veggie #34.


Once home, I started at it for a while and then decided that I had no clue where to start. I sat down with my laptop and found a recipe that seemed really interesting - Rutabaga Dijonnaise with Caramelized Onions. I had all the ingredients at home and this was a simple enough recipe, to which I made just a few minor modifications, including withholding any oil/fats.

Prep Time: 20 min

Ingredients:
  1. 2 medium Rutabaga
  2. 6 small Red Potatoes
  3. 2-3 tbsp Dijon Mustard
  4. 1 medium Red Onion, julienned
  5. 1/4 tsp Red Chili pepper
  6. Salt and Pepper, to taste.
  7. 1-2 tsp fresh Thyme leaves
Directions:

Wash the rutabaga under running tap water to remove any dirt on the outside. Then using a vegetable peeler remove the skin and cut off the ends to reveal the clean white flesh.

Cut slices and dice into large chunks for faster cooking.


Rinse the red potatoes under tap water, remove the 'eyes' using a sharp paring knife and dice. 


Wash both vegetables once more, drain and transfer to a deep stock pot, or a pressure cooker. I used a pressure cooker today. Add about 1/2 to 3/4 cup water (will not cover vegetables) and steam until full pressure is achieved. Remove from heat, and allow the pressure cooker to release steam on its own. 


Meanwhile, line a skillet with water and add the julienned red onion. Add a pinch of salt.


Once the water evaporates, the onions will start to caramelize. Add a splash or two of water as needed and caramelize the onions until they turn a rich golden brown color (a non-stick pan helps for this step!).


Once onions are caramelized, add the red chili pepper powder, mix well, add another splash of water, if needed to mix the spice with the onions and then transfer to a small dish and set aside. Once the pressure cooker releases steam, open and drain any excess water by pouring almost all of it out. If you want, you can save it for later to use as a vegetable stock. Using an immersion (stick) blender, puree the vegetables, mix in 2 tbsp of Dijon mustard, and salt and pepper to taste. 


Do a quick taste check and add more mustard, to taste. Add almost all the thyme leaves (save some for a garnish) and serve with a dollop of Spicy Caramelized Onions and a sprinkle of fresh thyme!

Rutabaga Dijonnaise with Spicy Caramelized Onions
My Assessment: I absolutely LOVED this dish today!! I was fully expecting to hate the taste of it given my lack of affection for turnips but the mustard must add something to it. I ate 2 bowls full and would have eaten more if I hadn't stopped myself. The texture was creamy (without any added butter or milk, not even non-dairy milk). The flavors were amazing. I loved the spicy caramelized onions with it as well!! Awesome!!!

June 22, 2012

Mung Bean Sprout Chaat

Growing up in India, our diet was primarily vegetarian, with the occasional indulgence in meat. Our diet however, was never lacking in protein. Everyone that eats a plant-based vegetarian diet gets asked that question "... but where do you get your protein?" - the answer is quite simple: Vegetables, Leafy Greens, Grains, Lentils, Beans ... all have wonderful amounts of protein. And we don't need to eat 600% of the RDA of protein like most people on a Standard Western Omnivorous diet. 

One of my uncles (Bade Dad), was very conscientious and made sure all of us kids ate a healthy diet. He was a wonderful cook and was often found in the kitchen futzing around with various recipes. One of the things he often did was soaked lentils or beans so that my aunt and mom knew what to cook for the next meal. He often also had them make mung bean sprouts. We typically ate this dish for a snack or even for breakfast. It has no added fat and is full of nutrition - protein, minerals, vitamins and even Iodine from the red onion ... all that fun stuff!!

Prep Time: 2 days for sprouting the beans; 10 min of actual dish prep time.

Ingredients:

  1. 1/2 cup Mung Beans
  2. 1 medium Cucumber, Seedless, diced
  3. 1 medium Red Onion, diced
  4. 2-3 tbsp minced, mixed, fresh herbs
  5. 1 lemon/lime (juice of).
  6. 1-2 tsp Chunky Chaat Masala, to taste (optional).
  7. Salt and Pepper, to taste

Directions:

The first step of this recipe requires some patience. Rinse mung beans and transfer to a large bowl. Soak overnight in ample amounts of water:

Time = 0 hours
The next morning, the beans should look nice and plump:

Time = 12 hours
Fill the bowl with tap water and rinse the beans again. The plump beans should rise to the top and any that did not absorb water will sink to the bottom (discard those).


Line the bottom of a colander with a folded paper towel or cheese cloth. transfer the beans and allow the excess water to drain out the bottom:


Soak another large piece folder paper towel, or cheese cloth with tap water and cover the beans completely. Place the colander in the same bowl, and cover the whole set up with saran-wrap or aluminum foil. This will prevent the beans from drying out. Leave the bowl on the kitchen counter. 

Time = 24 hours
After another 12 hours, remove the top cover, run a gentle stream of tap water over the beans. By this time most beans should have a small seedling (2-3 mm). Once the water drains out, replace the wet cover and saran wrap. 

Time = 36 hours
After another 12 hours, repeat the steps above. Most beans at this stage should have a 8-10 mm sprout. 

Time = 48 hours
On the second day, the sprouts should be close to 15mm long and that is when we typically stopped growing them further. After sitting for 2 days at room temperature, despite repeated washes in between, there is a chance for fungus etc. so I didn't want to risk it anymore. A lot of oriental dishes have sprouts that are far longer. I soaked the beans at this stage in a fresh bowl with a lot of tap water, and picked up the floating sprouts and transferred them to a fresh colander. Once well drained, I kept them overnight in the fridge. 

This evening, I transferred the sprouts to a pressure cooker and steamed them for less than 2 minutes. Bring 1/2 cup water to boil, add the sprouts and close the lid. Start the timer and as soon as 2 minutes is up, whether or not full pressure has been achieved, take the cooker off the stove and release the steam and drain immediately (mine were a little over-done today!). 


Meanwhile, dice onions and cucumbers:


And then in a large bowl, toss everything together. For fresh herbs, I used basil, cilantro, mint, oregano, thyme and spearmint, all chopped finely. I used Chunky Chaat Masala in my recipe, but if you don't have it, this is equally as enjoyable with just salt, pepper, and lemon/lime juice. 


Another way is prepare this dish is to wilt the onions in a skillet, with just a little bit of water, and then add the sprouts, and spices. Toss everything together for a couple of minutes, remove from heat, transfer to a large bowl and toss in fresh diced cucumber (and even tomatoes). Enjoy!!!


My Assessment: This is comfort food for me ... miss you Bade dad! 

June 17, 2012

Thyme-Wrapped Green Beans

So admittedly, Green beans are not new to anyone. Yet, I've made them New Veggie #32. The reason is clear - I've never made fresh green beans before. In India, I remember summer days spent stringing green beans (not my favorite job!). So I never made them once I moved out of Mom's house. 

In the US, pre-cut, frozen green beans are available year round. So, I never needed to make them from scratch.  Last weekend, when I finally made it to Norman's farmer's market stall, I saw fresh green beans and wanted to pick some up but couldn't get myself to do so given the extra work that goes into cleaning and stringing green beans. This weekend, I decided I needed to '(wo)man-up' and get some. How bad could it be ... & to be quite honest, it really wasn't as bad as I remembered it to be :)

Prep Time: 20-25 min with fresh pods, 15 min with frozen beans

Ingredients:
  1. 4-6 oz fresh green beans
  2. Thyme, 6-8 sprigs
  3. Salt, and pepper to taste
  4. Cooking spray
DirectionsPreheat oven to 425F and prepare a cooking sheet with a thin film of cooking spray. If using frozen beans, thaw the pods by running water over them until the pods and no longer frozen and brittle. With fresh beans, trim ends and wash the beans in fresh tap water. Once they're drained, sprinkle just a little bit of sea salt and toss the beans so that they begin to sweat a little.


Wrap springs of thyme a few beans at a time .. 


Place each bundle on the cookie sheet, such that they're a few centimeters apart.


Once done, roast the beans at 425F for 10 min. Remove from oven and transfer to a serving dish. 


My bundles fell apart as I tried to pick them up as the sprigs I used weren't long enough to be knotted. 


Garnish with a little bit of freshly cracked pepper and chomp away!! 
I served these with a small serving of a non-spicy version of HH Spicy Teriyaki Chickpeas. Yum! 

Nik's Reaction: His initial reaction was ... 'mom, I don't like bean beans' .. despite the fact that he usually gobbles them up faster than you can replenish his plate. Once I bribed him with a little post-dinner TV ;-) he was back to his usual ways ... he LOVED this recipe.  

Tony's Assessment: Me: Will you eat some green beans? T: Maybe, after I try 'em! ... and of course there was no stopping him once he did.                              

My Assessment: I loved it. Next time, I'll use more thyme and maybe knot the sprigs a little better. These tasted great but I think it would make for a great presentation if the knots had remained intact. Also, I don't think I even needed to use cooking spray. The beans had enough moisture that they would easily withstand a 10 min dry roast at 425F. Overall, this one definitely has a good chance of becoming a Gimme More recipe. 


May 8, 2012

Spinach, Lentils, Mushrooms & Wild Rice Risotto

I was itching for a one pan recipe tonight. I knew it had to be some sort of grain, with veggies and maybe some lentils to make it worth my while ... !! I also got some Barley the other day and had been wanting to use it. So this evening's research yielded a rather interesting recipe - Barley and Lentil Pilaf with Mushrooms & Spinach. Now that seemed like the perfect thing to make tonight and I was looking forward to trying barley .. except, I caught sight of a packet of Near East Long Grain and Wild Rice Pilaf, which has been sitting in my pantry for a while ... so quite serendipitously my plans for a barley and lentil pilaf turned into a risotto. I used the same recipe, only I used rice instead of Barley and green lentils instead of brown. 


Prep Time: 20-25 min

Ingredients:
  1. 1 Pack of Near East Long Grain and Wild Rice Pilaf
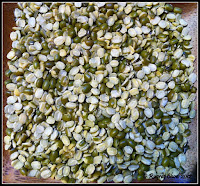
  2. 1/3 cup Split Mung dal (Green lentils)
  3. 2 sachets of Swanson Vegetable Flavor boost 
  4. 1 cup water
  5. 1 small Red onion, diced
  6. 1 cup baby spinach
  7. 4-6 large mushrooms, sliced  
  8. 1 tbsp pine nuts
  9. Salt and pepper, to taste
  10. 1 tsp fresh Thyme leaves. 

Directions:
Line a dutch oven, or deep (non-stick) stock pot with half cup of water and mix in both sachets of flavor boost. These are small sachets of concentrated broth, that can be stored at room temperature. I like using these because I can use one, or more, depending upon my recipe, and I don't need to worry about the rest of the carton of broth going bad in the fridge. Once the water comes to a boil and the flavor boost paste is mixed in, add dal and allow to simmer for 5-7 minutes while preparing everything else. Then, mix in the packet of rice, with provided seasonings. I did not use any oil for the rice.  


Turn the heat to medium low and let rice and dal simmer. Dice onions and add to the pot. Mix in and let simmer. Then add baby spinach, sliced mushrooms and pine nuts and continue to let it simmer until the rice and dal and both tender. If it begins to look a little dry, add a splash of water, as many times as needed. Given the slightly grainy nutty texture of the dal, the final dish should be a very moist, almost runny risotto, not a dry pilaf. I found that if you let it get too dry it doesn't taste as good. Once both the rice and dal are tender, add the thyme leaves, mix in, cover and let sit for 5 minutes to allow the flavors to meld together. Serve garnished with freshly cracked black pepper.    

My Assessment: I liked it .. and the best part, its a one-pot dinner, with enough leftovers for lunch too! My picture looks a little dry and not as moist as it should. My dinner sat for a few minutes while I ran around after Nik :) .. oh well! Life as a mom!! 

Herb & Spice Fact of the Day


Having nightmares? Place a little thyme under your pillow for a restful night! Thyme has been used for healing, good health, and cleansing. The ancient Egyptians used thyme in the mummification process. The ancient Greeks sprinkled thyme in their baths and used it on bandages to prevent infection. The ancient Romans used thyme in the treatment of depression. Thyme was also placed in coffins to ensure passage to the next world. Needless to say, thyme is packed with numerous health benefiting phytonutrients (plant derived compounds), minerals and vitamins that have made it so popular since ancient times. 

The essential oil, Thymol, is the main ingredients in thyme and it has been shown to have antiseptic and anti-fungal properties. Other volatile oils in thyme include carvacolo, borneol and geraniol. It also contains flavonoids and Phenolic antioxidants like zeaxanthin, lutein, pigenin, naringenin, luteolin, and thymonin. Fresh thyme has one of the highest antioxidant levels among culinary herbs. 

Thyme also is a rich source of B-complex vitamins, beta carotene, vitamin A, vitamin K, vitamin E, vitamin C and folic acid (Vitamin B9). There are more than a 100 varieties of thyme and each one has a slightly distinct taste. In general, thyme has a slightly pungent, spicy, clove-like flavor. It has a strong flavor, so a little bit goes a long way.