Showing posts with label V32 - Green Beans. Show all posts

November 2, 2014

Vegetables in Creamy Cashew Sauce

Someone in my Facebook Group (Indian Plant Based Whole Food Junkies) asked earlier today for a Korma recipe without tomatoes. Now growing up in India, I remember Korma as a hearty meaty dish with lots of caramelized onions and tomatoes. But, they'd tried it at an Indian restaurant and wanted a WFPB version. So I decided to give it a try today. She recalled it being in a creamy white sauce - my guess, they just skipped the tomatoes in their recipe. 


This recipe is an adaptation of an older recipe for TVP Korma which I modified today to make the creamy white sauce. I, of course, changed up the vegetables :) but I didn't call this dish a korma as it is not a true korma in my opinion. Maybe this isn't what you were hoping for :) but that's my 2c. 


Prep Time: 30 min

Ingredients (Serves 4):
  1. 2 cups Green Beans
  2. 1 cup Corn
  3. 1 x 12 oz Pack of Extra-Firm Silken Tofu 
  4. 1/2 Medium Red Onion, pureed
  5. 1 tbsp Ginger-Garlic paste
  6. 1/3 cup Raw Cashews, ground (I use a coffee grinder)
  7. 1 cup Non-Dairy Milk
  8. 1 cup Water or Vegetable Broth
  9. 1 tsp Ground Cumin
  10. 1 tsp Ground Cilantro Seed
  11. 2-3 tsp Garam Masala
  12. Salt and Pepper, to taste
Directions:
Line a skillet with water and add pureed onions and 1/2 tsp of salt. Saute and caramelize onions until they are a rich dark golden color (keep a measuring cup with water handy; keep stirring the onions until they dry up and start to stick to the bottom of the pan, which is fine, add a splash of water, which will allow the caramelized onions at the bottom of the pan to soften up again. Repeat the process until the onions are are rich red color). Once onions are done, add the ginger-garlic paste and repeat the same process until the mix is fragrant (2-3 min). At this point, add beans, corn, cashew powder, 1/2 cup non-dairy milk, spices and water. Mix well, reduce heat to medium-low, cover, and let simmer for 5-10 minutes. Meanwhile dice half the tofu into chunks and puree the remaining with 1/2 cup of milk. When you have a smooth creamy paste of tofu and milk, add that to the skillet, mix well and allow to simmer for another 5 min. At this point you can also add the diced tofu to the pan but be careful when mixing so as to not smoosh the pieces. When ready to serve, garnish with fresh coriander leaves and a fresh sprinkle of garam masala. 


Nutrition Facts (Per Serving): Calories 190 (Fat Calories 78)
Total Fat 8.7 g; Carbohydrates 19.6 g; Fiber 4.2 g; Sugars 4.0 g; Protein 10.9 g


If you liked this recipe, be sure to check out my Recipe Index for more Whole-Food, Plant-Based, No-Added-Oil recipes. You can also like Rugrat Chow! on Facebook. Thanks!

July 19, 2013

Bulgur on Soupy Asian Veggies

I did a Veggie Fact of the Day post yesterday to talk about my New Veggie #71 - Bulgur. I've had the Indian version of bulgur all my life (it's more golden, vs. the dark brown color I found here in the US). In India, it is usually made as a thick sweet porridge that is typically eaten for breakfast, but I always liked it best after it had been chilled in the fridge for a few hours. Here in the US, bulgur is more commonly used as a side dish and as a savory cereal, and that's how I decided to try it this time. It is an excellent low-glycemic white rice replacement and since Tony doesn't enjoy brown rice, I'm always looking for other whole grains that can be used instead. 

Bulgur on Soupy Asian Veggies
Prep Time: 20 min

Ingredients (Serves 4):
  1. 1 cup dry Bulgur
  2. 2 cups Home-made Vegetable Broth (or water)
  3. Salt, to taste
Ingredients (Serves 4) for Soupy Asian Vegetables:
  1. 15 oz No-Salt Diced Tomatoes (canned)
  2. 1 x 12 oz frozen Edamame
  3. 1/2 cup Frozen Green Beans
  4. 8-10 White Mushrooms, sliced
  5. 1 tbsp Ginger-Garlic Paste 
  6. 1 tbsp Rice Wine Vinegar
  7. 1 tbsp Brown Miso
  8. 3 tbsp Low-Sodium Soy Sauce
  9. 1 cup Water
  10. Salt, to taste
Directions:
Pressure cook bulgur and vegetable broth, under high pressure, for 8-10 minutes, in an electric pressure cooker. Or for the same time in a stove-top. If you don't own a pressure cooker, bring the bulgur and vegetable broth to a boil, reduce heat to a slow simmer, partially cover the pan and let simmer until all excess liquid has evaporated and the bulgur tastes nice chewy :) For the Soupy Asian Vegetables, mix everything in one pan, bring to a boil and then allow to simmer until bulgur is done. I'm not sure whether or not bulgur is traditionally eaten in the Far East. I just used it here as a substitute to rice. I really enjoyed the texture of bulgur (as did Tony), so it is definitely going on our rotation. 

Nutrition Facts (Per 1/4 cup Serving of Bulgur*): Calories 150 (Fat Calories 4)
Total Fat 0.3 g; Carbohydrates 32.0 g; Fiber 4.0 g; Sugars 0.0 g; Protein 4.0 g

Nutrition Facts (Per Serving*): Calories 188 (Fat Calories 42)
Total Fat 4.7 g; Carbohydrates 17.3 g; Fiber 9.4 g; Sugars 4.5 g; Protein 13.7 g


* Nutrition facts are provided for the water option as vegetable broth calorie content can vary a lot.

Tips for Leftovers:

  1.  One of the suggestions I've gotten, but not tried yet, is to use bulgur as a replacement for TVP in tacos and other dishes. Will definitely be giving that one a try!! 

April 21, 2013

Toasted Oats Daliya

I started using Steel-cut oats, instead of Old Fashioned (Rolled) oats for my morning oatmeal not too long ago (yes, I waited too long to try the real deal). Anyhow, one of the first things that struck me about steel cut oats is how much the flavor and texture matches that of Daliya.  

Daliya is the same thing as Bulgur. For those who haven't heard of it before, it is essentially a cereal made from the groats of different varieties of wheat, most commonly - durum. It is commonly used in cuisines across Europe, Middle East and South East Asia, especially Pakistan and North India. It has a light, nutty flavor, similar to steel cut oats, which is why I decided to try out steel-cut oats in the same recipe today. 

Oats Daliya w Spinach and Mixed Veggies
Prep Time: 20-30 min

Ingredients (Serves 2):
  1. 1/2 cup Steel-cut Oats
  2. 1 cup frozen mixed vegetables (peas, green beans, corn and diced carrots)
  3. 3 cups fresh Baby Spinach (or regular spinach leaves, coarsely chopped) 
  4. 1 tsp Onion Powder
  5. 1 tsp Garlic Powder
  6. 1 tsp Mustard Seeds (or Ground Mustard)
  7. 6 fresh (or frozen) Curry Leaves
  8. Salt and Pepper, to taste
  9. Hot Sauce (optional)
Directions:
Toast the steel cut oats in a dry skillet, on medium to medium-high heat, until golden. What the toasting does is make them less sticky once cooked and also somewhat reduces the amount of water they need to absorb when cooked. Once golden, transfer oats to a pressure cooker. Allow to cool for a couple of minutes and then add half a cup of hot water (1 to 1 with quantity of dry oats). Cover immediately and cook under high pressure for 2 minutes. Allow steam to dissipate on its own. This works really well in an electric pressure cooker but a stove top should work just as well. Basically that half cup of water is just enough to soak and cook the oats (without making them mushy) and to generate just enough steam in the pressure cooker to last for 2-4 minutes. It all happens super fast!! Do not uncover the pressure cooker even after the steam has dissipated (make sure you turn off the 'keep warm' function, and move the stove top cooker to a trivet). Let it sit until the veggies are ready.  

Li'l Nikhil made my day he saw me take the box of Baby Spinach out of the fridge this morning. He asked me Leaves (Baby Spinach) and Dip (Balsamic Vinaigrette) for breakfast!! And then of course, he continued on to admonish me on using up all the leaves for my breakfast - "but I won't have any left for me for tomorrow!!" :)
While the oats are cooking, line the dry skillet used for toasting them with a thin layer of water and add onion, garlic and mustard seeds and frozen vegetable mix. Add a sprinkle of salt, and allow vegetables to thaw. Then mix in the curry leaves and saute until they release their aromatic oils (within 1-2 minutes). Then add the baby spinach and allow to wilt and mix everything together. 

Taste test for salt and pepper and once the vegetables are ready, open the pressure cooker, scrap the oats out with a wooden spatula (I've found that steel cut oats never get fluffy like bulgur but remain sticky). Add oats to the vegetables and toss everything really well together making sure to break up the larger pieces of crumbly oats. Garnish with freshly cut cilantro leaves and serve with hot sauce, or fresh mint chutney!

My Assessment: I liked this version of savory oats much better than the recipes I've posted before using old-fashioned oats. And of course, this is the whole, minimally processed, grain so it is much healthier as well. And it tasted just like wheat daliya :) so that was a great substitution that worked! 

Nutrition Facts (Per Serving): Calories 218 (Fat Calories 31)
Total Fat 3.4 g; Carbohydrates 40.1 g; Fiber 7.8 g; Sugars 4.5 g; Protein 9.0 g

April 6, 2013

Savory Oats Upma

My typical breakfast for the last couple of month has been a big bowl of my Everyday Oats. This morning, I didn't have any bananas at home and that is my main source of sugars in my regular recipe. I wasn't really in the mood to add Maple Syrup or Agave to my usual recipe (it just doesn't taste as good without a banana). So I decided to make some Savory Oats Upma.

Upma is a traditional South Indian Breakfast preparation which has traditionally been made with Semolina (Rava or Suji). These days a number of variations of Upma can be found in restaurants and include wheat berries, rice, rice vermicelli, durum wheat semolina or even pearl sago. I decided to add another variation to it and made it with Old Fashioned Oats, which are also known commonly as Rolled Oats. I think this would work great with Steel-Cut or Irish Oats as well.

Savory Oats Upma
Prep Time: 15-20 min

Ingredients (1 servings):
  1. 1/2 cup Old Fashioned Oats
  2. 1/2 cup Unsweetened Almond Milk (I use Silk Plain)
  3. 1 small Red Onion (julienned)
  4. 1 cup Frozen Mixed Vegetables (mine had corn, peas, carrots and green beans)
  5. 2 tbsp Raw Peanuts, roasted in the microwave.
  6. 1 tsp Ginger-Garlic Paste
  7. 1 tsp Mustard Seeds
  8. tsp Cumin Powder
  9. 1 tsp Chilli Powder (I use Deggi Chilli Powder)
  10. 1 tsp Ground Mustard 
  11. 4-6 Curry Leaves
  12. Salt and Pepper, to taste
Directions:
In a microwave-safe bowl, mix oats and almond milk and microwave each on high for 3 minutes; set aside. After a few minutes, mix well so that the oats are moist, yet crumbly. I used a 1:1 proportion of oats to liquid as I don't like them mushy. You can increase the liquid if you like. In a separate microwave-safe bowl, roast raw peanuts until they release some of their oils and the skins can be brushed off (microwave on high in 1 minute increments, making sure to mix with your fingers after each minute - you want to roast, not char them - that's why you can't leave them in there for 5 minutes straight). My 2 tbsp peanuts were roasted in 4 intervals of 1 minute each, with about 30 seconds in between each session. Once done, let sit for a couple of minutes to cool and then rub between your fingers or palms to remove the skins, which can be discarded. 

Line a non-stick skillet with water and add mustard seeds and ginger-garlic paste. Saute for a couple of minutes, add another splash of water and add onions. Saute until caramelized. Once done, add curry leaves, saute for another couple of minutes and then add the vegetables. Allow the vegetables to thaw, adding more water as needed and cook until the vegetables are fork tender and all the flavors are well blended. Taste test for salt and garnish with pepper. Either toss the oats in at this time and mix everything together, or serve over a bed of oats with roasted peanuts.  

Nutrition Facts (Per Serving): Calories 398 (Fat Calories 125)
Total Fat 13.9 g; Carbohydrates 58.6 g; Dietary Fiber 13.1 g; Sugars 10.6 g; Protein 15.8 g

February 9, 2013

Savory Oats w Green Beans

Most people, including my husband, grew up eating Instant Oats out of a serving sized sachet. Most people, including my husband (and I), often gagged at the taste of wet cardboard in our mouths. It was either too sugary, or too tasteless to be considered food. I've never been a fan of instant oats and so until recently have stayed away from oats, in general. Whenever I hit a 'healthy eating' phase in past years, I'd buy a 6-pack of instant oatmeal and eat it over months, gagging all the way.

In recent months, since I went plant-based, I've heard such wonderful things about Oats and how good they are for the heart & so I've started including Old Fashioned Oats in my diet. I tried a few recipes for overnight oats. Mostly, I tolerate it and I've come to the conclusion that it is because I've never liked eating sweet breakfasts. For those of you who're interested, here's an excellent blog post about Oats and Avenanthramides - polyphenolic antioxidants found in oats which have been shown to have anti-inflammatory, anti-proliferative, and anti-itching activity, and have been implicated to provide additional protection against coronary heart disease, colon cancer, and skin irritation. Here's another peer-reviewed article which discusses the effect of avenanthramide on inhibition of vascular smooth muscle cell proliferation. All in all ... Oats are great for your heart ... so eat away!! And this recipe will go a long way in making your eating enjoyable!! :)

Savory Oats with Green Beans
Prep Time: 15-20 min

Ingredients (2 servings):
  1. 1 cup Old Fashioned Oats
  2. 1 cup Unsweetened Almond Milk (I use Silk)
  3. 4 Sun-Dried tomatoes (Plain dried, Whole foods 365 brand, sliced w kitchen scissors)
  4. 1 small Red Onion (julienned)
  5. 1 cup French-cut Green Beans (or any other vegetable you like, spinach would be great!)
  6. 1/2 tsp Garlic powder
  7. 1/2 tsp Mustard powder
  8. 1/2 tsp Cumin Seed powder
  9. A pinch of Turmeric
  10. A pinch of Smoked Chipotle Pepper powder (optional; this packs some heat!).
  11. Salt & Pepper, to taste
Directions:
In 2 separate microwave safe bowls, add 2 sliced sun-dried tomatoes, 1/2 cup old-fashioned oats and 1/2 cup almond milk. Microwave each on high for 3 minutes and set aside. After a few minutes, mix well so that the oats are moist, yet crumbly. I used a 1:1 proportion of oats to liquid as I don't like them mushy (see notes above about instant oats!). You can increase the liquid if you like.  

Oats and Tomatoes (after microwaving)
In a non-stick skillet, saute onions in water until caramelized to a rich maroon color. if you've never sauteed onions in water before - see this recipe. This should only take 4-6 minutes. Once done, remove onions from skillet and set aside. Line the same skillet with water and add garlic, mustard, cumin and turmeric to the water and add green beans. I used frozen french-cut green beans. Allow the beans to thaw and the spices to blend in well. Mix until done (fork tender) adding a splash or two of water as needed to prevent burning. Once beans are done, add onions to the mix, give it all a quick toss and divide the veggies over the 2 bowls of oats and sun-dried tomatoes. Add salt and pepper, as needed. Serve warm. 

Savory Oats with Green Beans
My Assessment: I loved it. This is my new favorite breakfast. I can easily make the veggies in a larger batch and refrigerate and then prepare the oats and tomatoes in the morning before work in the microwave. Looking forward to a whole new way of eating breakfast :)

Nutrition Facts (Per Serving): Calories 390 (Fat Calories 74)
Total Fat 8.2; Cholesterol 0g; Carbohydrates  63.7g; Dietary Fiber 11.2g; Sugars 6.3g; Protein 12.9g

January 30, 2013

Chinese Fried Rice

I seem to be on a rice kick these days. After making the Fiesta Toss-Up last night, I was still craving some rice this evening. Since Dr. McDougall, and others, promote consumption of healthy starches such as Brown Rice, I have no guilt whatsoever :) and consume rice several times a week. What I do try to do is add loads, and I literally mean loads, of veggies to my rice dishes so as to balance out the starches with fiber and nutrition. Today, I decided to make a plant-based version of Chinese Fried Rice. 

Chinese Egg (Tofu)-Fried Rice 
Prep Time: 30 min

Ingredients (6 BIG servings):
  1. 1.5 cups Brown Basmati Rice (dry)
  2. 1 recipe Happy Herbivore Basic Tofu Scramble
  3. 2 pks (12 oz) Birds Eye - Steamfresh Mixed Vegetables - Corn, Peas, Carrots, Green Beans
  4. 2 pks (12 oz) Birds Eye - Steamfresh Blends - Asparagus, Gold & White Corn, Baby Carrots
  5. 2 tbsp Rice Wine Vinegar
  6. 1 tbsp Ginger-Garlic Paste
  7. 4 tbsp Low-Sodium Soy Sauce
  8. Salt to Taste
Directions:
In a deep pan, bring 6-7 cups of water to boil and add brown rice. Simmer until tender and then drain and set aside. Prepare HH Tofu Scramble and set aside. I used black salt in my recipe to get the extra egg-like flavor. In a large skillet, thaw out veggies and allow any excess water to dry out. Then add the rice wine vinegar, ginger-garlic paste and soy sauce. Give everything a good toss and cook for a few minutes to allow the ginger-garlic paste to cook for a few minutes. Taste test the veggies at this stage. They should be saltier than you like them typically, because you will be adding a large amount of steamed rice. When the veggies start releasing the lovely aroma of Chinese food (its a mix of ginger and rice wine vinegar), add the steamed rice, give another good toss, and then add the HH Tofu Scramble and mix everything together. Turn off the stove, cover and let sit for a few minutes to allow the flavors to blend together. Serve warm, with freshly cracked black pepper for a garnish. 

Chinese Egg (Tofu)-Fried Rice
My Assessment: This was a great dish. Even my 17-year old step-son, who refuses to eat "my plants" enjoyed a big bowl-full. Tony loved it too (despite the fact that he abhors tofu ... he thinks I used Ener-G Egg Replacer in this recipe). 

Nutrition Facts (Per Serving): Calories 448 (Fat Calories 69)
Total Fat 7.7; Cholesterol 0g; Carbohydrates 72.1g; Dietary Fiber 9.0g; Sugars 12.2g; Protein 18.7g

January 29, 2013

Feisty Fiesta Toss!

So T wanted tacos and he wanted quinoa for dinner tonight. I wanted something Mexican but wasn't sure I wanted to really eat the tortillas. I knew I wanted lots of veggies and I wanted to incorporate some greens in my dinner AND I wanted rice. A tall order? Naaah ... its not THAT difficult to make tacos, veggies, rice, quinoa and greens ... heck .. I decided to mix them all together :) 

Fiesta Toss-Up
This recipe is inspired by Happy Herbivore's Vegan Taco Salad

Prep Time: 20-25 min

Ingredients (Serves 6):
  1. 1 cup TVP crumbles (reconstituted) OR 1 cup Brown Lentils (Masoor Dal, steamed)
  2. 1 cup Brown Rice 
  3. 1 Pk Birds Eye - Steamfresh Mixed Vegetables - Corn, Peas, Carrots, Green Beans
  4. 1 x 15oz can of Black Beans
  5. 1 Medium Tomato, fresh, diced
  6. 2 cups of Baby Spinach, fresh
  7. 2 tbsp Low-Sodium Soy Sauce
  8. 2 tbsp Onion flakes
  9. 2 tsp Minced Garlic
  10. 2 tsp Ground Cumin
  11. Salt & Pepper to taste
  12. 2-4 tbsp Medium Salsa
Directions: 
Place TVP crumbles in a fine mesh hand-held strainer and run water over the it for a couple of minutes. This removes any TVP dust and also partially reconsititutes the TVP.  Place TVP in a skillet and add half a cup of water and all dry spices. Mix well and allow water to evaporate. Then add steamed brown rice and baby spinach and toss well. Allow the spinach to wilt. Meanwhile steam the pack of mixed vegetables in the microwave (about 5 minutes). Transfer contents of the skillet to a large bowl and add salsa, steamed vegetables, black beans and fresh diced tomatoes. Add a sprinkle of fresh cilantro leaves, if available. Toss everything together and serve warm, with freshly baked tortilla chips to scoop up the veggie loaded crumbles. For those who like tostadas, serve over corn tortillas after crisping them in the oven (flat cookie sheet, 10 min @350 F). Yum!

Fiesta Toss-Up Tostada
My Assessment: This was a great WARM way to enjoy lots of veggies and carbohydrates. If you're watching carbs (I'm not sure why anyone would!), enjoy just the toss-up without the tortillas. If you're in the mood for a burrito, wrap the toss-up into a large tortilla.  Of course, if you're in the mood for a salad, go right back to the original HH recipe !!! This was a hit even with my non-TVP eating husband!! He loved it and asked to take leftovers for lunch ... AGAIN!!! Score :)

Nutrition Facts (Per Serving, with TVP): Calories 240 (Fat Calories 9)
Total Fat 1.0g; Cholesterol 0g; Carbohydrates 44.0g; Dietary Fiber 8.9g; Sugars 7.0g; Protein 15.5g

Nutrition Facts (Per Serving, with Lentils): Calories 224 (Fat Calories 10)
Total Fat 1.1g; Cholesterol 0g; Carbohydrates 45.8g; Dietary Fiber 8.8g; Sugars 5.6 g; Protein 10.5g

December 26, 2012

The Kitchen Sink Soup

Cold winter days call for a heartwarming soup and some home-made bread. I got wish #1 today. My husband coined the term The Kitchen Sink Soup - according to him ... "Its got everything in it, but the kitchen sink!" ... well yes, it is kind of true. I always use the same basic recipe and it works like a charm, every time, no matter what you put in it. 

The Kitchen Sink Soup
Prep Time: 20-30 min

Ingredients:*
  1. 2 cups Protein (Red Kidney Beans, Black beans, Chick Peas, Various Lentils)
  2. 2 cups Vegetables (Onion, Spinach, Green Beans, Corn, Peas, Carrots, Kale, Celery)
  3. 1/2 cup Starch (Red Potatoes, White Potatoes, Brown Rice, Wild Rice, Barley, Quinoa, Noodles)
  4. 1/2 cup Mushrooms (white, cremini, shiitake, portabella, oyster)
  5. 4-6 cups Vegetable broth
  6. 6-8 Dry Sun-dried Tomatoes (I buy the Whole foods 365 brand), sliced/diced.
  7. 1 tbsp Minced garlic
  8. 1 tbsp Miso (Barley or Soy).
  9. Pepper, to taste.
Directions:
Line a stock pot with vegetable broth and add garlic. Once the garlic begins to release its aroma, add remaining ingredients (except Miso). Bring to a rolling boil. Reduce heat and allow to simmer until whatever starch you've added are done. When I use beans and/or chickpeas, I typically use canned. When I use lentils, I tend to use red lentils which are quick-cooking. Once starches are done cooking, turn off heat and add miso. I used Barley miso today. I typically don't discriminate between various kinds of Miso and use them interchangeably in my recipes. Do a quick taste test and if needed added more broth (as needed) and miso for flavor, or salt (if you prefer). Garnish with freshly ground black pepper and serve steaming hot. 

The Kitchen Sink Soup
Today, I used Red kidney beans, Baby spinach, Red Onion, Green Beans, White mushrooms and a blend of Brown and Wild rice. Umm Umm Good!! 

Wish #2 (homemade bread) will be granted soon ... Santa brought me a B&D Bread Maker!!! Yeah!!!


* This is a 'no added salt' recipe i.e. no salt is added over and above what is already in the condiments. In this soup, all the salt is coming from Miso and the sun-dried tomatoes add a lot of flavor, thereby reducing the need for additional salt. 

December 2, 2012

Kerela Green Beans

Traditionally, green beans at Thanksgiving are unrecognizable in the Green Bean Casserole. While GBC was always my most favorite Thanksgiving dish, I do realize that any nutritional benefits that one might get from eating green beans were smothered completely by the Cream of Mushroom soup (which gets 50% if its calories from fat) and french fried onions. So I decided to revamp, and Indianize, the staple green bean at my Thanksgiving Table with Fraans Bean Thoran. 

A dish native to the South Indian state of Kerela (God's Own Country), Thoran is traditionally made of finely diced/chopped vegetables. While it is made most often with green beans, it can also be made with carrots, cabbage, green tomatoes, jackfruit and even bittergourd. The vegetable is mixed together with grated coconut, mustard seeds, curry leaves and turmeric and is traditionally eaten with steamed plain white rice. The humble person's dinner .. totally delicious and so nutritious. Being the lazy cook that I am, and because my knife skills leave much to be desired, I make my thoran with whole or french cut green beans.

Fraans Bean Thoran
Ingredients: 
  1. 3 packs of frozen Whole Green beans  
  2. 1 shallot, chopped (optional) 
  3. 1 tbsp Olive oil 
  4. 1 tsp Minced Garlic
  5. 2 tsp Whole mustard seeds
  6. 2 tsp Ground mustard powder
  7. Salt and pepper, to taste. 
  8. 1/4 to 1/3 cup Fresh/Frozen/Dried Coconut.* 
Directions (45-60 min before Dinner):
If using whole fresh beans, cut ends and remove threads. Bring a pot of water to a rolling boil and blanch beans (add to boiling water, boil for 2-3 min, drain, and drench in ice cold water). If using french-cut beans, blanching is not necessary.  In a sauteing pan, heat oil until sizzling and add mustard seeds (warning, mustard seeds can pop when added to hot oil, so be careful). As the aroma is released from the mustard seeds (5-15 seconds in hot oil), add the rest of the ingredients and mix. Add green beans, give it a quick toss and then transfer the beans to a lidded casserole dish, sprinkle coconut on top. Cover and let sit in oven at 250 F until ready to serve.

* while a thoran is traditionally made with coconut, if you're not a big fan of coconut, it can be skipped and the dish is great even without it. 

July 6, 2012

Herb Fresh Quinoa Pasta

I started a herb garden this year and right now, despite constant and very regular pruning, I've got an herb-garden-gone-wild situation. An abundance of Basil, a ton of oregano, insane amounts of mint and spearmint and a sage bush :) The only 2 that aren't going so crazy are the rosemary and the cilantro. Anyhow, I knew that I wanted to use a lot of 'something' for dinner tonight, and this is the concoction I came up with. Pretty darned good if I may say so myself!! :)


Prep Time: 20 min

Ingredients: 

  1. 1 10oz Pk Ancient Harvest Quinoa Spaghetti
  2. 1 16oz bag of frozen french-cut Green beans (or use fresh beans).
  3. 1 tsp minced garlic
  4. 1/2 to 3/4 cup non-dairy milk
  5. 1/8 cut fresh chopped Basil and Oregano
  6. 1-2 tsp white Miso
  7. 1/4 cup Daiya Mozzarella style shreds
  8. Salt & Pepper, to taste
Directions:
Boil spaghetti according to package directions and set aside. In a skillet, add a third of a cup of non-dairy milk and add minced garlic and Miso. Once the milk begins to boil and the miso dissolves, add green beans and cook on medium until tender.  Then add the remaining milk and bring to a quick boil. Add most of the cheese to the milk and allow a minute or so to melt. Then add spaghetti and give it all a good toss. Cover and let sit for a few minutes to allow the spaghetti to absorb any remaining liquid. Uncover, mix chopped herbs in and give another quick toss. Garnish with freshly cracked black pepper and salt, if needed, and top off with mozzarella shreds.  I didn't add any salt at all today as the Miso provided quite a bit and the dish had a slightly sweet refreshing flavor of the fresh herbs. I tried Miso for the first time today and loved the sharp cheesy flavor it imparted to the dish. Um Um Good!! 


Coder Household Assessment: Li'l Nik loved it!!  More than the pasta, he picked green beans from his plate. Tony had enjoyed this dish so much the first time I made it that he actually requested I make it again today!! Overall, a hit!!

What is Miso? Happy Herbivore has done a couple of different posts about it. Here's a link

July 2, 2012

Vegetable Dum Biryani

Almost any kind of rice dish is comfort food for an Indian. My son, born and raised American, definitely has India in his blood ;-) because he is most definitely a rice eater. A quick 20 minute meal tonight called for Vegetable Biryani. Loads of vegetables and spices and white rice make for the perfect comfort food. 

Vegetable Biryani
Prep Time: 20 min

Ingredients (6 Servings):
  1. 1 cup long-grain Basmati rice
  2. 1 small red onion
  3. 2 cups vegetables (I used shredded carrots, green beans, shelled edamame and shiitake mushrooms)
  4. 2 tsp ground Cumin
  5. 2 tsp ground Coriander
  6. 1 tbsp Garam Masala, or to taste
  7. Salt and Pepper, to taste 
  8. Hot Sauce, or any Spicy Indian Pickle
Directions:
Dum Biryani
In a deep stock pot, add 1/2 cup water and red onion. Once the onion becomes translucent, add the other vegetables and all dry spices (save 1 tsp Garam masala). Once the vegetables are tender, rinse rice in tap water to get rid of any dust and add to the pot. Add 2 cups water and bring to a boil. Then, cover and reduce heat to medium low. Cook until rice is tender (~10 min). Turn off heat. Sprinkle remaining garam masala over the rice and replace the lid. Add a weight (a few cans of beans) to the lid and let sit for 5-7 min. This is the 'dum' phase - literally it means adding strength. What it does is allow all the flavors to blend, allows the rice to absorb any remaining water and the whole dish becomes fluffy. 

He's 100% a Sawhney kid. Loves his rice, just like Nanu!!
Nutrition Facts (Per Serving)*: Calories 155 (Fat Calories 5)
Total Fat 0.6 g; Carbohydrates 33.7 g; Fiber 2.6 g; Sugars 2.9 g; Protein 4.6 g

*Nutrition Facts Added March 25, 2013 (Using 1 cup peas, 1/2 cup carrots and 1/2 cup Corn).

June 25, 2012

HH "Cheater" Pad Thai

So last night, there was just Nik and I at home and I wanted a quick dinner for the two of us. The li'l guy hadn't had a nap all day, so I also needed something that would go down relatively easily i.e. it needed to be a favorite ... and noodles, in any form, generally do the trick. I settled for HH "Cheater" Pad Thai.  

Prep Time: 10 min

Ingredients*:

  1. 1 small red onion, julienned
  2. 1/2 cup shredded carrots
  3. 6-8 white mushrooms, sliced
  4. 1/2 cup frozen green beans
  5. 2 tsp Ginger-Garlic Paste
  6. A double batch of HH Cheater Pad Thai Sauce** 
  7. 2 tbsp roasted peanuts, crushed/crumbled. 
  8. 1 cup Quinoa Pasta (Spaghetti) 
HH Cheater Pad Thai
Directions:
Line a skillet with water and saute Ginger-Garlic paste followed by all the veggies. Separately boil pasta noodles and set aside. Once the veggies are ready, add sauce and allow to coat all the veggies. Add noodles and toss everything together. Garnish with roasted crushed peanuts! Slurp!! 

Nik's Reaction: As I said at the start, any kind of noodles are a big hit! He ate a nice big helping and apple on the side too! I'm quite sure that slurping noodles is probably one of his favorite activities.


* A 'no added salt' recipe i.e. no salt is added over and above what is already in the condiments.
** Since I was cooking for a 3-year old, I skipped both the chili and the hot sauce.

June 21, 2012

Oyster Mushroom Tossed Pasta

I've been eating a lot of grains and whole veggies lately and some days you just need a hearty pasta dish. I bought a few bunches of fresh Oyster mushrooms (New Veggie #14) at the store yesterday and wanted to use those maybe in a Lo-mein

When I got home, I only had regular spaghetti noodles (which we buy mostly for the kids). I prefer Quinoa Pasta these days and all I had was shells. So, slight change in plans - I made this lovely tossed pasta with lots of veggies instead - perfect for a summer evening !!  

I told somebody today that I've never met a mushroom I didn't love. Oyster mushrooms with their very characteristic aroma and flavor and slightly chewy texture are on top of my list of favorites. I usually further enhance the flavor of Oyster mushrooms by adding Oyster sauce. Yum!

Prep Time: 20 minutes

Ingredients:
  1. 4-6 oz Oyster mushrooms, sliced
  2. 1 cup baby spinach
  3. 1/2 cup mixed frozen Veggies 
  4. 4 oz Quinoa shells. 
  5. 1/2 cup Vegetable broth
  6. 2 tbsp Low-Sodium Soy Sauce
  7. 2 tbsp Liquid Aminos
  8. 1 tbsp Rice Wine Vinegar
  9. 1 tbsp Ginger-Garlic Paste
  10. 1-2 tbsp Vegetarian Oyster Sauce
  11. Freshly cracked pepper, to taste
Directions: Boil pasta shells and set aside until ready to toss. Line a skillet with vegetable broth and add ginger-garlic paste. Once that is fragrant, add the liquid ingredients (except the Oyster sauce) and stir well. Next add the baby spinach and allow to wilt (2-3 min). Once the spinach is wilted, add the remaining  veggies and toss for a couple of minutes until thawed. 


Add the pasta shells and toss again. Add the oyster sauce at the very end, and garnish with freshly cracked black pepper after a quick (and final) toss!! Enjoy!!


Nik's Reaction: This one was another hit. He didn't much care for the mushrooms (more for me!) but ate the shells and veggies with gusto!! Yay!

June 17, 2012

Veggie Fact of the Day


Green Beans can be found on dinner plates across the world. Kids and adults alike love the flavor and texture of the tender, flexible green pods. Green beans originated in North and South America, India and China. They did not become popular until the 1800s, because they were an expensive vegetable. 

Fresh beans are low in calories, have no saturated fats and are a great source of dietary fiber, vitamins A, B1 (thiamin), B6 (pyridoxine), B9 (folic Acid), B12 (cobalamin), C and K. One cup of green beans has a whopping 120% of the RDA for Vitamin K. Green beans are also a great source of polyphenolic antioxidants such as lutein, zeaxanthin and beta-carotene and minerals such as iron, calcium, magnesium, manganese, and potassium. Interestingly, green beans are not just green and come in white, purple, golden, and red pods as well.

Thyme-Wrapped Green Beans

So admittedly, Green beans are not new to anyone. Yet, I've made them New Veggie #32. The reason is clear - I've never made fresh green beans before. In India, I remember summer days spent stringing green beans (not my favorite job!). So I never made them once I moved out of Mom's house. 

In the US, pre-cut, frozen green beans are available year round. So, I never needed to make them from scratch.  Last weekend, when I finally made it to Norman's farmer's market stall, I saw fresh green beans and wanted to pick some up but couldn't get myself to do so given the extra work that goes into cleaning and stringing green beans. This weekend, I decided I needed to '(wo)man-up' and get some. How bad could it be ... & to be quite honest, it really wasn't as bad as I remembered it to be :)

Prep Time: 20-25 min with fresh pods, 15 min with frozen beans

Ingredients:
  1. 4-6 oz fresh green beans
  2. Thyme, 6-8 sprigs
  3. Salt, and pepper to taste
  4. Cooking spray
DirectionsPreheat oven to 425F and prepare a cooking sheet with a thin film of cooking spray. If using frozen beans, thaw the pods by running water over them until the pods and no longer frozen and brittle. With fresh beans, trim ends and wash the beans in fresh tap water. Once they're drained, sprinkle just a little bit of sea salt and toss the beans so that they begin to sweat a little.


Wrap springs of thyme a few beans at a time .. 


Place each bundle on the cookie sheet, such that they're a few centimeters apart.


Once done, roast the beans at 425F for 10 min. Remove from oven and transfer to a serving dish. 


My bundles fell apart as I tried to pick them up as the sprigs I used weren't long enough to be knotted. 


Garnish with a little bit of freshly cracked pepper and chomp away!! 
I served these with a small serving of a non-spicy version of HH Spicy Teriyaki Chickpeas. Yum! 

Nik's Reaction: His initial reaction was ... 'mom, I don't like bean beans' .. despite the fact that he usually gobbles them up faster than you can replenish his plate. Once I bribed him with a little post-dinner TV ;-) he was back to his usual ways ... he LOVED this recipe.  

Tony's Assessment: Me: Will you eat some green beans? T: Maybe, after I try 'em! ... and of course there was no stopping him once he did.                              

My Assessment: I loved it. Next time, I'll use more thyme and maybe knot the sprigs a little better. These tasted great but I think it would make for a great presentation if the knots had remained intact. Also, I don't think I even needed to use cooking spray. The beans had enough moisture that they would easily withstand a 10 min dry roast at 425F. Overall, this one definitely has a good chance of becoming a Gimme More recipe. 


April 23, 2012

Couscous & Veggies

Tonight's dinner was of the super-quick variety. Ready and on the table in 15 minutes. I used frozen veggies and a pack of instant couscous. 


Prep Time: 15 min

Ingredients:
  1. 1 Pk. Near East Couscous
  2. 1 cup Vegetable broth
  3. 1/2 cup frozen peas
  4. 1/2 cup frozen green beans
  5. 2-3 tbsp Tomato paste, canned
  6. 1 tsp minced garlic
  7. Salt, and freshly cracked pepper, to taste 

Directions: Line a skillet with 1/4 cup vegetable broth and add frozen veggies, once the broth begins to boil, season with garlic and salt and cook until tender and the liquid is all but evaporated. Meanwhile, measure the remaining Vegetable broth and add water, as needed according to the package instructions. Mix tomato paste in this liquid and bring to a boil. Add couscous, mix and remove from heat. Cover, and let stand for a few minutes (I followed package instructions with the exception of adding tomato paste and withholding olive oil). Once the veggies are done, transfer everything to one pan and mix well. Cover and let sit for another few minutes. Season with freshly cracked black pepper.

My Assessment: Super quick, easy meal. Load up on whatever veggies you like. It makes for 2 filling meals. Yay for leftovers for lunch! 

April 18, 2012

HH Veggie Lo-Mein

Growing up, we ate a lot of Chinese food from this little shack which was just a couple of miles from our house. I don't even remember what it was called anymore. Indo-Chinese cooking, as we called it, has a few items on it that you can't find at traditional Chinese restaurants, or even Americanized Chinese food. Veggie Lo-Mein however, is a staple item on Chinese Restaurant menus ... that I could eat multiple times a week and still go back for more. In the past few months, I've tried a couple different recipes and today I tried to follow one from the Everyday Happy Herbivore Cookbook (Page 195).  

EHH Veggie Lo-Mein
Now for those of you who follow my blog (... & a big THANK YOU to all 10 of you!) this shouldn't come as a surprise. Being a person of Indian origin, its not in my genetic makeup to follow a recipe to a tee. I always make changes to it. Sometimes this blows up in my face .. like it did just last night (Swiss Chard Pie). So today, I decided that I would make minimal changes ... !! Ahem @ minimal ;-)

The full recipe is of course copyrighted so I can simply tell you some of my modifications. The result was 100% totally absolutely fantastic. Even li'l Nik wolfed down 2 servings. He started out his evening at home with a sliced-up orange as he watched me get dinner ready with a constant stream of questions ... 

"Mom, what is that?" (at the sight of a block of Extra-firm tofu). "Mom, why are you cutting it?" (as I sliced the tofu) "Mom, why did you do that?" (as I moved tofu to the skillet). Nik, this is Tofu. I'm putting it in the pan so that we can eat it. "Oh!" ... And then, after a few minutes of silence ... (thanks to the pieces of orange that he stuffed his face with!). "Mom, put that in the pan" (as I finished cutting some more tofu). "Mom, you missed one piece" and then ".. now cut that one, Mom!" ... more silence thanks to a full mouth. "Mom, are those noodles?" (at the sight of Udon noodles boiling on the stove). "Mom, are we eating noodles?" (Yes, honey, we are). "Oh!"

And so my evening progressed with questions and instructions from an almost 3-year old. As you've guessed by now, I used Japanese Udon noodles today. The recipe simply calls for 'any' kind of Asian noodles. I simply boiled those according to the instructions. Once tender, I rinsed them quickly with cold tap water and then set them aside until later. The EHH recipe didn't call for tofu but I was craving tofu for some reason (protein ...!). I used Nasoya Extra firm tofu, drained it, sopped off the excess liquid with a paper towel and diced it into big chunks. 


I used a non-stick pan, and pan-roasted the tofu until it was getting golden brown. I did not use any butter or oil for this step. In the initial few minutes, I had to move around the chunks just a little bit as they release water and that can make them stick a little bit. Once each chunk formed a skin on it, they didn't stick at all. At some point during this process I added a splash of soy sauce and tossed the tofu around it to get a nice caramel color to it. This was honestly my ONE change from the EHH recipe .. a little extra soy sauce.  


I fried the tofu until I felt I had the right amount of color to it.  Once done, I removed the tofu from the skillet and set it aside. In the same skillet, I added a thin layer or vegetable broth and followed the directions  to stir fry the veggies. Today, I used Shiitake mushrooms (Veggie #13), carrots, Italian green beans, peas and a single stalk of celery.  


Overall, my veggie to noodle ratio was easily 2 to 1, maybe even heavier on the veggie side. Once the veggies were almost done, I added the noodles, tossed everything together, and added the sauce, as the recipe called for, and gave it another quick toss. In the end, I tossed the pan-roasted tofu and gave another quick toss. Finally, I covered the skillet and let it all sit for a few minutes to allow the flavors to blend.


And then, li'l Nik and I sat down to dinner (all the other boys were out) and his commentary started all over again. He first instructed me "Mom, roll your noodles" and proceeded to show me how to roll my noodles onto my fork (never mind the fact that he's 3 and I'm the one who taught him how to eat his spaghetti). He would then shovel this loaded fork into his mouth and use his left hand to control where the noodles went as then came off the fork. It was quite the sight!

.. now eat it, Mom!
The last part of our meal was the most fun. Nik decided that I was obviously uninitiated and needed to be shown how to suck up noodles with my mouth. He'd suck on each noodle and then break out into a series of giggles. And then, the process would start up all over again :)


Overall, this meal was an A+.

February 16, 2012

Mushrooms & Green Beans

This is a great side dish, but also works as the entree!! With a prep time of only a 10-15 minutes, it's great for a quick meal on a week night too.


Ingredients
  1. 1 cup fresh frozen french cut green beans
  2. 1 cup white button and baby portabella mushrooms
  3. 1/4 cup vegetable broth
  4. 1 tsp minced garlic
  5. 1 tsp whole mustard seeds
  6. 1-2 tsp Tony Cachere's Creole Seasoning
  7. salt and pepper to taste. 
Directions: 
In a deep skillet, heat up the vegetable broth and add garlic and mustard seeds. Once the broth comes to a boil add the green beans and allow to cook for a few minutes. Then add mushrooms, halved or quartered depending on the individual size, and add seasonings. Cover and simmer for 5 minutes or until the broth is almost gone. Season with salt and freshly ground black pepper. I served this as a side dish with my sandwich for dinner, but I plan on eating whats left, by itself, for lunch tomorrow. 

Nik's Reaction: He shoveled the green beans in about as quickly as he could swallow 'em. We're still working on the fungi ... !!! 


December 3, 2011

Thanksgiving - Indian Ishtyle


At the first thanksgiving, the pilgrims gave thanks with the Indians. Being the dot, not feather, kind of Indian, I've added my own twist to each traditional dish, and each one has multiple options (I get bored easily!), which I may, or may not use each time. Here's the full meal. With preparations beginning up to 2 days in advance, it still takes me a whole morning, and into the early afternoon to make and serve the whole meal. This ain't no hurried up, quick and easy, Rugrat Chow - that's for sure!!

Turkey Do Pyaza - Decoration centrale!

Ingredients for the Rub: Use multiple of the below-mentioned recipe, depending upon the size of the bird. 
  1. 1 tbsp ginger/garlic paste
  2. 3 tbsp cooking oil (canola, olive, vegetable)
  3. 2 tbsp lime juice
  4. 1 tbsp cumin powder
  5. 1 tbsp coriander powder
  6. salt and pepper, to taste. 
Ingredients for the Stuffing of the BirdThis is one of my options. I use this version, or you can stuff bird with actual bread stuffing (see below), or not stuff at all and leave the cavities empty (note: cooking times are different for stuffed and unstuffed birds!).
  1. 4 to 6 shallots, pealed and halved, if necessary.
  2. 2-3 tbsp fresh cilantro leaves, chopped. 
  3. 1 to 2 tbsp of the rub above. 
Ingredients for the Gravy: A pretty standard gravy recipe. This is perhaps the only thing in this meal that is 100% traditional.
  1. Turkey stock & drippings
  2. 1/4 to 1/3 cup all-purpose flour
  3. 1 tsp poultry seasoning (or 1 Wyler's chicken bouillon cube)
  4. salt and pepper (freshly ground), to taste
Directions:
Thaw turkey, remove neck and giblets for stock, rinse and pat dry with a paper towel. Mix the rub in a large bowl and rub evenly and thickly on all the cavities. Take a piece of plastic wrap & wrap it around your index finger. Use wrapped finger to separate skin from the bird (works like a charm!!). Massage the rub under the skin, evenly and thickly. Pull skin back to keep juices in. Toss the shallots and cilantro with about 1 or 2 tbsp of the rub. Leave the neck cavity empty. Stuff the big cavity, very loosely, with shallots and cilantro. 


Turkey in the NuWave!
Place turkey on the rack. Fold neck skin under the body. Tuck wing tips under each breast and clamp or tie drumsticks together using kitchen twine. Roast in a large roasting pan (450F, lower third of the oven). Approximate calculation is about 30min/lb of stuffed turkey. There are several websites that give roast turkey calculations for stuffed and unstuffed birds. It should be cooked until a thermometer inserted into the fleshy part of the thigh or breast registers 170F. Our option is to use a NuWave oven (a big hurrah for HSN!!!!) and it works great for bird up to 14 lbs. 


Once done, lift the bird by tilting slightly to allow any juices to drip into the pan. Then, lift the bird using turkey forks, or the rack, and transfer to a serving platter. Let the bird sit on a serving platter for 30-45 minutes before carving. This helps preserve the juices. Use the drippings and juices for the gravy.


Turkey Stock:
Boil giblets, neck and liver (usually removed from the big cavity) in 2 to 3 cups of water for about an hour or two and reduce to about 1/2 or 3/4 cup. Remove solids (I use the liver, diced finely, in my bread stuffing!). Mix this stock with juices from the roasting pan and use for preparing the gravy. 

Turkey Gravy:  
Strain the turkey stock/drippings if necessary. In a medium saucepan, bring the stock to boil. Reduce to medium heat. Dissolve all-purpose flour in water. Gradually whisk into the heated stock, watching the whole time for chunks. Season and bring to a boil, then reduce heat and simmer until the gravy thickens. Voila!


Masaledaar Dabalroti - East-Indian Stuffing:

East Indian Stuffing
Ingredients:
  1. 1 to 1.5 loaf of white bread (air dried overnight, and cut into 1 inch cubes)
  2. 4-6 tbsp unsalted butter
  3. 2 medium red onions - coarsely chopped (I usually cut and refrigerate these the previous evening!)
  4. 1 big bunch of celery - rinsed, cleaned and chopped (same as onion, prep work on previous evening).
  5. 1 lb mild Italian sausage (deskinned) - this is one of my options. If you use sausage, use half to a third of the quantity of butter. 
  6. 1 tbsp parsley (dry), or about 1/4 cup fresh leaves, coarsely chopped.
  7. 2 tbsp poultry seasoning (or 2 Wyler's chicken bouillon cubes)
  8. 2 eggs, beaten
  9. 1 tsp cinnamon powder
  10. 2 tsp garam masala
  11. 1 cup chicken broth
  12. salt and pepper, to taste
  13. 1/4 cup raisins, or pine nuts, or chopped walnuts/pecans (optional). I may or may not use nuts, depending upon who's attending. Allergies and other medical problems need to be accounted for ... !!
Directions:
In a large pan, or dutch oven, melt butter over medium heat and add chopped onion and celery and cook until translucent. If using Italian sausage, cook separately, and transfer to the pan in which the stuffing will be prepared. Depending upon how greasy the sausage looks, adjust the amount of butter. Once onions and celery are cooked in with the sausage, add spices, stir. Add cubed bread, mix well. Add nuts or raisins (I generally skip the nuts and raisins if I'm using sausage). Moisten with chicken broth, add eggs, mix well. Transfer to a buttered casserole dish and bake, covered with aluminum foil, at 350F for 30-45 min. Then bake uncovered for about 15 min for a crisp crust. 

Stuffing the Bird: 
If you're stuffing the bird with bread stuffing, bring the stuffing to room temperature. Loosely fill both cavities (remember it expands as it cooks!). Secure neck skin after stuffing with a metal or wooden skewer. Loosely fill body cavity and cover the opening with a slice of fresh bread to hold the stuffing in place as it cooks (or it will ooze out as it cooks!).  After the bird is cooked, check the temperature of the stuffing along with the bird. If the temperature of the stuffing is <165F, its best to transfer it to a casserole dish and cook for another 15-20 minutes, to prevent any chance of uncooked juices from the bird being consumed.   


Masala Aaloo - Spicy Roasted Red Potatoes!
    Masala Aaloo
    Ingredients:
    1. 2 sacks of Russet red potatoes
    2. 1 tsp ginger/garlic paste
    3. 1 tbsp whole mustard seeds
    4. 1 tbsp McCormick's Steak Seasoning (my little cheat non-Indian ingredient!!)
    5. 1 tbsp garam masala
    6. 2 tbsp olive oil
    7. salt and pepper, to taste
    Directions:
    Rinse and cut potatoes into halves, or quarters, depending upon the size (with skin). In a separate pan, heat oil until sizzling and add mustard seeds (warning, mustard seeds can pop when added to hot oil, so be careful). As the aroma is released from the mustard seeds (5-15 seconds in hot oil), add the rest of the ingredients and mix well.  Add potatoes and toss well. Transfer to a baking sheet and roast uncovered at 350F until done. 


    Teekhee-Meethee Gajar - Spiced Candied Carrots!
      Candied Carrots
      Ingredients:
      1. 2 or 3 packs of frozen, crinkle cut, carrots. 
      2. 1/2 cup coconut milk
      3. 1 to 2 tsp Cayenne pepper
      4. 4 tbsp Brown Sugar
      5. salt, to taste
      6. Freshly chopped cilantro leaves, for garnish.
      7. 2 tsp cooking oil
      Directions:
      In a deep pan, heat oil and add cayenne pepper. Once the aroma is released, add coconut milk and salt and bring to a simmer. Add carrots, cook for a few minutes (do not wait for these to become fully tender, as they will become mushy in the oven). Transfer to a casserole dish, with just a little bit of the coconut milk (save the rest for later). Sprinkle brown sugar on top. Cover and set in oven at 350F until ready to serve. Check periodically to make sure they don't dry out. If needed, add more of the saved coconut milk mixture. Garnish with cilantro leaves just before serving. 


      Shakarkandi ki Sabzee - Candied Yams in Coconut Milk!
        Candied Yams
        Ingredients:
        1. 1 lb north american yams (sweet potatoes!) 
        2. 1 medium red onion, diced. 
        3. 1 tbsp ginger/garlic paste
        4. 2 tbsp cooking oil
        5. 1 tsp cumin seeds
        6. 2 whole green cardamoms.
        7. 1 bay leaf
        8. 4-6 whole black peppercorns
        9. 1 inch cinnamon stick
        10. 1/2 tsp Cayenne pepper
        11. 1 tsp coriander powder
        12. 1 tsp garam masala
        13. 1 cup coconut milk
        14. 2 tbsp chopped cilantro leaves
        15. salt, to taste
        16. 4 tbsp brown sugar for topping
        Directions:
        Peel and dice yams into 1 inch cubes. In a colander, sprinkle liberally with salt and stand for 10-15 min in the sink. Steam (boil) in ample water for about 10 min until barely soft. In a sauteing pan, heat oil and over medium heat, add cumin. Once the aroma is released, add onions and ginger/garlic paste and cook until the onions are a nice golden color. Add remaining spices. In a separate sauteing pan, heat oil and saute yams until golden brown as well. Drain excess oil on paper towels. Add coconut milk to the onion/spice mixture and bring to a simmer. Reduce head and simmer for a few more minutes. Add yams, mix well (should be almost dry, but moist at this stage; do not wait for the yams to become fully tender, as they will become mushy in the oven). Transfer to a casserole dish. Sprinkle brown sugar liberally on top. Cover and set in oven at 350F until ready to serve. Check periodically to make sure they don't dry out. If needed, add 1 to 2 tbsp of coconut milk. Garnish with cilantro leaves just before serving.


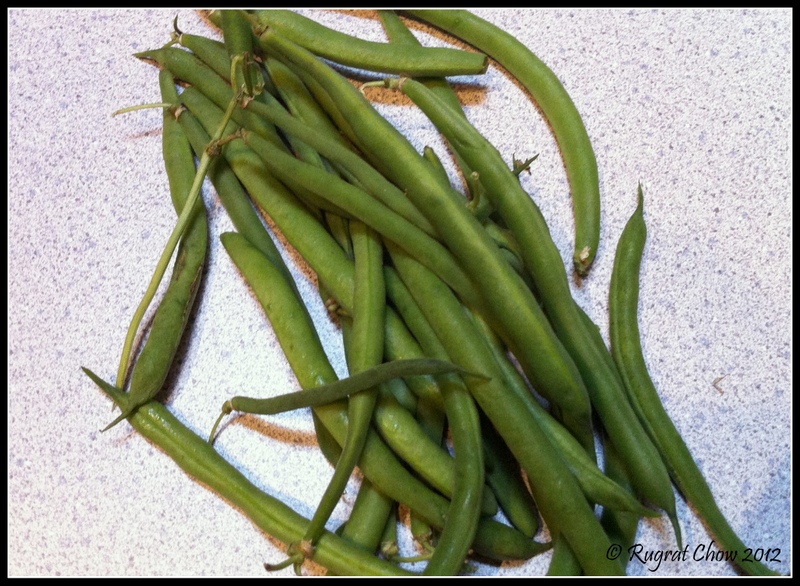
        Fraans Bean Thoran - Kerela Green Beans!
          Fraans Bean Thoran
          Ingredients:
          1. 2 or 3 packs of frozen green beans (cut into 1 inch lengths or whole beans). 
          2. 1 shallot (optional)
          3. 1 to 2 tbsp cooking oil
          4. 1 tbsp whole mustard seeds
          5. 1/2 tsp turmeric powder
          6. salt and pepper, to taste.
          7. 1/4 to 1/3 cup grated fresh, or frozen, coconut.
          Directions:
          If using whole fresh beans, cut ends and remove threads. Bring a pan of water to a rolling boil and blanch beans (add to boiling water, boil for 3-5 min, drain, and drench in ice cold water). In a sauteing pan, heat oil until sizzling and add mustard seeds (warning, mustard seeds can pop when added to hot oil, so be careful). As the aroma is released from the mustard seeds (5-15 seconds in hot oil), add the rest of the ingredients and mix well. Add green beans and mix well. Add half the coconut at this stage. Mix well. Transfer to a casserole dish, cover and set in oven at 250F until ready to serve. Add the rest of the grated coconut just before serving, for that extra crunch. 


          Cranberry Chutney!
            Cranberry Chutney
            Ingredients:
            1. 1 can of whole berry cranberry sauce 
            2. 1 can of jellied cranberry sauce 
            3. 1 tsp ginger/garlic paste
            4. 1/2 cup Apple Cider Vinegar
            5. 1/4 tsp black pepper
            6. 1/2 tsp ground cinnamon.
            7. 1/2 tsp all spice
            8. 1/2 tbsp garam masala
            9. 1/4 cup chopped walnuts (optional)
            10. 1/2 orange (individual pieces peeled, and diced
            11. 1-2 inch of orange rind (finely diced)
            12. 2 tbsp lemon/lime juice
            13. 1/2 cup raisins
            14. 1 apple (diced) (optional)
            15. 1 tsp Cayenne pepper (optional)
            Directions:
            Combine vinegar, ginger/garlic paste, sugar and all spices in a heavy sauce pot and simmer for 10-15 min, or until only about 4 tbsp remains (Warning: boiling apple cider vinegar makes the house stink! I usually prepare this at least 2 evenings in advance, as the chutney keeps well for at least a week). Add both cranberry sauces and salt. Mix well and bring to a simmer. Add fruits, nuts (if using) and lemon juice. Simmer slowly for about 15-20 minutes. Bring to room temperature, transfer to a tupperware container and store in the fridge.


            The Final Serve:
            Here's how I progress through this dinner. I get all the sides ready and in the oven, at about 220F while the turkey is getting done. The potatoes are tossed in the spices and sitting on cookie sheets, ready to pop in the oven. Once the turkey is done, and is resting, I get the oven up to 350F and let all the precooked sides get nice and hot. After about 10 minutes, I get the gravy going (may need a second person to keep that going) and start removing the other sides out of the oven and add final garnishing touches. In go the potatoes for about 15 min. If not done in 15 min, transfer the potatoes to a microwave safe casserole dish and nuke 'em for 3-5 min to get them nice and tender. Once the potatoes are out of the oven, increase the temperature to the desired temperature for store-bought dinner rolls. While the rolls are going, get the side salad (if serving one) and salad dressing out of the refrigerator. Set butter out for the rolls, and get a bread basket ready. While the rolls are in the oven, start carving the turkey (remember to get some of the dark meet sliced as well). We usually say a prayer in thanks ... and then enjoy the spread!! I served my dinner with a couple bottles of prechilled Gerwurtraminer (and my cousin brought a couple bottles of sparkling cider which worked great as well!).