April 25, 2012

Tomato Rice, with Potatoes

A friend of mine that secretly follows my blog :) commented on one of my rice recipes. She suggested I add tomatoes to my Turmeric Spice Rice, to obtain some added benefits from lycopene. So here's what I came up with this evening ....!! Unlike its authentic namesake from Southern India ... this is a rather bastardized version ;-)


Prep Time: 30 min

Ingredients:
  1. 1 cup Basmati rice, and 1.5 cups cold tap water
  2. 1 large Red Onion, diced
  3. 1 large tomato, diced
  4. 1 large potato, diced
  5. 1/2 cup Vegetable broth
  6. 4 Bay leaves
  7. 4-6 Cloves, whole
  8. 1/2 tsp Turmeric powder
  9. 2 tsp Cumin
  10. 2 tsp Garam Masala
  11. Salt, and Pepper, to taste
  12. A Sprig of Coriander leaves
Directions:
In a deep stock pot, add vegetable broth, and diced onions. Sprinkle a tsp of salt and saute onions on medium heat until translucent and cooked down, without burning. Reduce heat and add all the dry spices and mix well. Once the aromas are released, add diced tomato and cook for another few minutes. Then, add diced potatoes and do the same. Add rice, add 1.5X cold tap water and mix everything well and increase heat to high. Bring to a boil, reduce heat to medium low and cover the pot so as to leave a sliver of space between the the pot and the lid, to allow some evaporation but not a lot. Cook for 15 minutes of so. When the rice look about done, turn off heat and cover completely. If possible, place a heavy weight over the lid to prevent any steam from escaping. This helps cook any remaining rice perfectly. After about 5-7 minutes, uncover, sprinkle a tsp of Garam masala over the top, garnish with Coriander leaves and enjoy!!

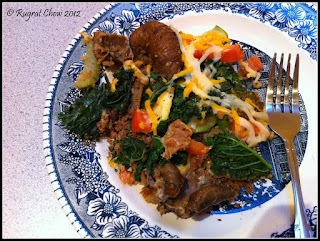
Nik's Reaction: A picture says a 1000 words ... gobble gobble was all he could come up with as he licked even his utensils clean. This pic was taken at the beginning of his meal. I ate the rice, Indian style, with my hands and when he saw that, he wanted to follow suit. Of course, by the time I thought of taking a pic, he was done :(

My Assessment: The tomato did add a certain something to this dish. It was spicy and salty and tangy all at the same time. I'll definitely make this again. Maybe even without the potatoes. 

April 24, 2012

Roasted Potato (& Asparagus) Salad

I must be back in my Quick & Easy meal mood, cause tonight's dinner literally required 5 minutes of prep time, 15 minutes in the oven and on the table in 2 minutes. I got a bottle of Salsa Verde at the store this past weekend and was itching to eat it. But I knew I didn't just want to have tortilla chips with it. Also, earlier today, Happy Herbivore polled folks on Facebook about which kind of baked potato they liked, Sweet or White? .... that got me thinking of baked potatoes. I, of course, like both kinds :) but must have been in the mood for white as I requested T to pick up a sack of roasting white potatoes from the store on his way home. Unfortunately, I get home well after 6 pm, and couldn't possible afford a whole hour of potato roasting time in the oven (I personally don't like Microwave roasted potatoes). So my only option was to cut 'em open and roast little pieces. & here's what I concocted.... Roasted Potato Salad, with and without Roasted Asparagus.

Prep Time: 5 min of preparation, 15-20 min in the oven, and 2 min to bring it all together.  

Ingredients
  1. 3 Russet potatoes, cut into 2-3" wedges, skin on.
  2. 1 small Red Onion, diced finely
  3. 1 large tomato, diced finely
  4. 2-3 springs of Cilantro leaves
  5. 15-20 stalks of Asparagus (New Veggie #21)
  6. 4-6 tbsp Salsa Verde
  7. Salt, and freshly cracked Black pepper, to taste
Directions:
Preheat oven to 350F. Soak potatoes in a large bowl of cold water and scrub skins well with a vegetable scrubbing brush. Make sure that there are no blemishes or dirt spots on the potatoes. Remove if any are visible on the outside. Pat dry and cut into wedges, with the skin on. Check again for any deep dirt filled crevices, or blemishes and remove. Spread wedges skin side down on a cookie sheet on a SILPAT mat.    If you don't have a Silpat, you can use parchment paper instead, or spray the cookie sheet with cooking spray. Sprinkle with salt and roast potato wedges at 350F for about 15-20 minutes until a pin inserted into the thickest part of a wedge slides in smoothly. 

Version 1: In a large salad bowl, toss all the remaining ingredients together (with the exception of Asparagus). As soon as the potatoes are done, drop them into the salad bowl and toss everything together. 

Version 1: Roasted Potato Salad
Version 2: On a second ungreased baking sheet, with or without parchment paper, spread out asparagus in a single layer, and roast at 350F as well. Once the asparagus starts to wilt, remove, sprinkle with a dusting of sea salt, and transfer to a cutting board. Cut the stalks into 2-3" pieces and as soon as the potatoes are done, toss everything together. 


My Assessment: While this salad tasted great while the potatoes were still warm from the oven, I think it will taste as good even when cold. This would be a great, make-ahead, addition to a back yard party in the summer. The Salsa verde, the tomatoes and fresh onions gave it a lovely fresh taste and potatoes gave it the starchy bulk. I really liked this salad and will most definitely make it again! 

April 23, 2012

Curried Kale & Mushrooms

So maybe its just me and I'm stingy with my kale ... but each time I've bought a bunch of kale, I've ended up using it for 2 or 3 different recipes. This time was no different. I made the Zucchini & Kale Casserole earlier in the week and had about half the bunch leftover, that I needed to use soon. Also, I had some fresh white button mushrooms in the fridge which I wanted to use before they became covered in dark blemishes. 

Curried Kale & Mushrooms
Most importantly, given my recent inspiration and my return to a maker of Indian flat bread i.e. Rotis/Chapatis ;-) ... I spent $39.99 and bought me a marble pastry board on Saturday. Of course, I was dying to give it a try as I had a tough time rolling out rotis on my old (slightly warped) wooden cutting board.  

Chakla (Hindi: चकला)
Since I had to make rotis, and I had to use my Kale and I had to use my fresh mushrooms, the choice was easy. I had to make a curry, which I called rather inventively, Curried Kale & Mushrooms :) !! What is  Curry? ... Now, a lot of folks think that all curries are the same and all curries have curry powder in them. Unfortunately, this couldn't be farther from the truth. Curry is a rather generic term applied by Western cultures to a wide variety of cuisines including Indian, Pakistani, Bangladeshi, Sri Lankan and even Thai. While most of these cuisines employ a lot of similar spices and herbs, not all curries are made equal and not all curries have the same, or all, the available herbs and spices.  Curries may be wet or dry, spicy or bland, and may use whole or powdered spices, and even raw or roasted spices. Interestingly, even the same vegetables are not always cooked with the same blend of spices, even in the same country. In Southern India, Green Beans are made simply with mustard seeds and coconut milk, while in the North, the same green beans are cooked with cumin, coriander and turmeric.  The version I made today, leans more towards Southern India, but is definitely not authentic cuisine, and I used only 2 spices for this curry.

Prep Time: 20 min

Ingredients:
  1. 6-8 leaves of Kale, stalks removed and leaves torn into bite sized pieces (New Veggie # 23)
  2. 6 oz fresh mushrooms, cleaned and quartered
  3. 1/4 cup vegetable broth
  4. 1-2 tsp Mustard seeds
  5. 1 tsp Black Sesame seeds
  6. 1-2 tsp Split Urad dal (green lentils)
  7. 1 tsp minced Garlic
  8. 1 small red onion, diced
  9. 1 small/medium tomato, diced
  10. Salt, and freshly cracked Black pepper, to taste. 
Directions
In a dry non-stick skillet, roast the lentil seeds until golden brown and then quench the heat with vegetable broth to prevent the lentils from burning. Add mustard, sesame and garlic and allow the aromas to be released before adding onions and tomatoes. saute for a few minutes ad add Kale. 


Allow the leaves to wilt, toss everything together, and then add the mushrooms.


Toss everything together and add salt to taste. Remember to go easy on the salt as both the mushrooms and the kale will cook down considerably. Cover the skillet, and let the flavors blend for a few minutes until all the water is evaporated. Serve with freshly made chapatis. Yum!!

My Assessment: This dish is fresh despite the veggies being cooked down thanks to the minimal spices. It's a great summer dish to enjoy even with just bread, if Chapatis are not your thing ... ! Feel free to substitute any kind of leafy green instead of Kale and any kind of mushroom that you have on hand. In fact, you don't even need to add mushrooms. That's the wonder of Indian cooking, you can improvise everyday and come up with a new dish with the same ingredients. Enjoy!!

Couscous & Veggies

Tonight's dinner was of the super-quick variety. Ready and on the table in 15 minutes. I used frozen veggies and a pack of instant couscous. 


Prep Time: 15 min

Ingredients:
  1. 1 Pk. Near East Couscous
  2. 1 cup Vegetable broth
  3. 1/2 cup frozen peas
  4. 1/2 cup frozen green beans
  5. 2-3 tbsp Tomato paste, canned
  6. 1 tsp minced garlic
  7. Salt, and freshly cracked pepper, to taste 

Directions: Line a skillet with 1/4 cup vegetable broth and add frozen veggies, once the broth begins to boil, season with garlic and salt and cook until tender and the liquid is all but evaporated. Meanwhile, measure the remaining Vegetable broth and add water, as needed according to the package instructions. Mix tomato paste in this liquid and bring to a boil. Add couscous, mix and remove from heat. Cover, and let stand for a few minutes (I followed package instructions with the exception of adding tomato paste and withholding olive oil). Once the veggies are done, transfer everything to one pan and mix well. Cover and let sit for another few minutes. Season with freshly cracked black pepper.

My Assessment: Super quick, easy meal. Load up on whatever veggies you like. It makes for 2 filling meals. Yay for leftovers for lunch! 

April 19, 2012

Zucchini & Kale Casserole

As I drove home this evening, I kept wondering about what I would make for dinner tonight. I had 2 zucchini sitting in the fridge that I absolutely needed to use soon and I also had a large bunch of kale, which was also teetering on the brink. I decided that there had to be recipe out there that would allow me to use both. Sure enough, a quick Google search lead me to a blog called "Epicurean Vegan" where I found this wonderful recipe for a "Zucchini & Kale Breakfast Frittata".  As soon as gave it a quick read through - I knew it was a winner!! 


Since I modified the recipe based on the ingredients I had on hand, I'm presenting the recipe as I made it here. Credit for the original definitely goes to Epicurean Vegan

Prep Time: 30-40 min

Ingredients:
  1. 4 links of MorningStar Farms® Veggie Breakfast Sausage  
  2. 2 medium Zucchini, sliced
  3. 12-15 fresh, or dried Oyster mushrooms (New Veggie #14) - I used dried mushrooms.
  4. 2-3 cups of Kale (New Veggie #23), stalks removed and leaves torn
  5. 1 medium tomato, diced
  6. 5-7 Wasa Whole Grain crackers, crumbled
  7. 1 packet Veggie Shreds, Cheddar & Pepper Jack blend
  8. 1 tbsp minced Garlic
  9. 2 tbsp dried Onion flakes 
  10. 1 tbsp dried Parsley flakes
  11. 1/8 cup Vegetable broth
  12. Salt and freshly ground pepper, to taste.
Directions:
Preheat oven to 350F. In a sauce pot, bring 1/4 cup of water to boil and add the frozen links of breakfast sausage and dried mushrooms. Allow the water to simmer for a couple of minutes and then turn off heat, cover and let sit. After a few minutes remove sausage links (should be well thawed); crumble with a fork.  


Line a non-stick skillet with vegetable broth and add garlic, parsley, onion flakes and crumbled sausage and cook for a few minutes. When the broth is almost all evaporated, drain mushrooms and add to the skillet as well. You can save the water used to reconstitute the mushrooms for later, but sometimes it can be gritty, so it may need to be strained if you want to use it in a recipe. Saute the mushrooms for a few minutes. 


Then, add the sliced zucchini and toss everything together. Sprinkle some salt over the squash to make it sweat and begin to cook. Add a splash of water, if necessary, to prevent sticking in the pan. 


Meanwhile, crumble the Wasa crackers by putting them in a ziploc bag and pounding the bag with a rolling  pin. It's a great way of letting out your frustrations from a rough day at work too ;-) !! Once crumbled, line the bottom of a 9x13 baking dish with crackers and top with a thin layer of cheese. 


Once the zucchini begins to gain a slightly translucent look (just beginning to cook), add the kale to the skillet and toss everything together. Allow to wilt. Add another splash of water, if necessary, to prevent sticking. This step can be hastened by putting a lid on the skillet. 


Once the kale is wilted, transfer the veggies to the prepared casserole dish, over the layer of crumbled crackers and cheese. 


Top off the veggies with a layer of finely diced tomatoes ... 


And another layer of cheese. I also added a generous sprinkling of freshly ground black pepper. The original recipe called for covering the dish with foil and baking, or baking uncovered for crisper Kale. I decided to bake it uncovered. Set the timer to 15 minutes. The layer of crackers absorbs any moisture from the veggies if they sweat and in just 15 minutes, the casserole is perfectly done!!  


I let it sit for a couple of minutes before I cut into it. 

My Assessment: The original recipe called for Daiya cheddar shreds and Field Roast Sausage. I will definitely make this again, but only after I get those 2 products. I had bought both the sausage and veggie shreds I used today before I went 100% plant based and unfortunately neither of these met my current dietary habits. The casserole though was absolutely awesome. I could have eaten the whole pan but restrained myself to 1 serving. 

April 18, 2012

HH Veggie Lo-Mein

Growing up, we ate a lot of Chinese food from this little shack which was just a couple of miles from our house. I don't even remember what it was called anymore. Indo-Chinese cooking, as we called it, has a few items on it that you can't find at traditional Chinese restaurants, or even Americanized Chinese food. Veggie Lo-Mein however, is a staple item on Chinese Restaurant menus ... that I could eat multiple times a week and still go back for more. In the past few months, I've tried a couple different recipes and today I tried to follow one from the Everyday Happy Herbivore Cookbook (Page 195).  

EHH Veggie Lo-Mein
Now for those of you who follow my blog (... & a big THANK YOU to all 10 of you!) this shouldn't come as a surprise. Being a person of Indian origin, its not in my genetic makeup to follow a recipe to a tee. I always make changes to it. Sometimes this blows up in my face .. like it did just last night (Swiss Chard Pie). So today, I decided that I would make minimal changes ... !! Ahem @ minimal ;-)

The full recipe is of course copyrighted so I can simply tell you some of my modifications. The result was 100% totally absolutely fantastic. Even li'l Nik wolfed down 2 servings. He started out his evening at home with a sliced-up orange as he watched me get dinner ready with a constant stream of questions ... 

"Mom, what is that?" (at the sight of a block of Extra-firm tofu). "Mom, why are you cutting it?" (as I sliced the tofu) "Mom, why did you do that?" (as I moved tofu to the skillet). Nik, this is Tofu. I'm putting it in the pan so that we can eat it. "Oh!" ... And then, after a few minutes of silence ... (thanks to the pieces of orange that he stuffed his face with!). "Mom, put that in the pan" (as I finished cutting some more tofu). "Mom, you missed one piece" and then ".. now cut that one, Mom!" ... more silence thanks to a full mouth. "Mom, are those noodles?" (at the sight of Udon noodles boiling on the stove). "Mom, are we eating noodles?" (Yes, honey, we are). "Oh!"

And so my evening progressed with questions and instructions from an almost 3-year old. As you've guessed by now, I used Japanese Udon noodles today. The recipe simply calls for 'any' kind of Asian noodles. I simply boiled those according to the instructions. Once tender, I rinsed them quickly with cold tap water and then set them aside until later. The EHH recipe didn't call for tofu but I was craving tofu for some reason (protein ...!). I used Nasoya Extra firm tofu, drained it, sopped off the excess liquid with a paper towel and diced it into big chunks. 


I used a non-stick pan, and pan-roasted the tofu until it was getting golden brown. I did not use any butter or oil for this step. In the initial few minutes, I had to move around the chunks just a little bit as they release water and that can make them stick a little bit. Once each chunk formed a skin on it, they didn't stick at all. At some point during this process I added a splash of soy sauce and tossed the tofu around it to get a nice caramel color to it. This was honestly my ONE change from the EHH recipe .. a little extra soy sauce.  


I fried the tofu until I felt I had the right amount of color to it.  Once done, I removed the tofu from the skillet and set it aside. In the same skillet, I added a thin layer or vegetable broth and followed the directions  to stir fry the veggies. Today, I used Shiitake mushrooms (Veggie #13), carrots, Italian green beans, peas and a single stalk of celery.  


Overall, my veggie to noodle ratio was easily 2 to 1, maybe even heavier on the veggie side. Once the veggies were almost done, I added the noodles, tossed everything together, and added the sauce, as the recipe called for, and gave it another quick toss. In the end, I tossed the pan-roasted tofu and gave another quick toss. Finally, I covered the skillet and let it all sit for a few minutes to allow the flavors to blend.


And then, li'l Nik and I sat down to dinner (all the other boys were out) and his commentary started all over again. He first instructed me "Mom, roll your noodles" and proceeded to show me how to roll my noodles onto my fork (never mind the fact that he's 3 and I'm the one who taught him how to eat his spaghetti). He would then shovel this loaded fork into his mouth and use his left hand to control where the noodles went as then came off the fork. It was quite the sight!

.. now eat it, Mom!
The last part of our meal was the most fun. Nik decided that I was obviously uninitiated and needed to be shown how to suck up noodles with my mouth. He'd suck on each noodle and then break out into a series of giggles. And then, the process would start up all over again :)


Overall, this meal was an A+.

April 17, 2012

Swiss Chard Pie

A few days hiatus and I'm back with a new vegetable. New Veggie #26 is Swiss Chard. I looked for a few recipes online and then came across one that seemed perfect  (Fat Free Vegan Kitchen/Savory Swiss Chard Pie) except I didn't have a couple of ingredients but I figured I could use a couple of substitutes. Unfortunately, halfway through my preparations, my blender decided to go belly-up on me ... and that started a downward spiral for this recipe. My pie didn't look half as pretty as the original recipe :(


Prep Time: 60 min

Ingredients:
  1. I bunch of Swiss Chard (mine had about 9 big leaves in it)
  2. 5-6 stacks of Celery (the original recipe calls for a medium onion)
  3. 2 cloves garlic, minced
  4. 12 oz firm/extra-firm Silken tofu, drained
  5. 1/4 cup (60 ml) plain soy milk
  6. 1 tbsp Cornstarch
  7. 1 tbsp roasted slivered almonds (I didn't have any cashews on hand)
  8. 4 tbsp dried onion flakes (I figured I'd add a little more since I used Celery instead of the onion)
  9. 1/8 tsp turmeric
  10. 1 pinch nutmeg
  11. 1/8 tsp cayenne
  12. 1/8 tsp Cumin powder (donno why I added this).
  13. 2 tsp tsp dried Cilantro leaves (I didn't have any Thyme, or any of Thyme substitutions on hand!).
Directions: Here's the recipe as I made it and it came out quite so-so! I think I made several mistakes and some of my modifications/substitutions didn't work really as well as I hoped they would.  So, first step - preheat oven to 375F. The original recipe called for a 9" ceramic pie pan and all I had was glass, so that's what I used (first mistake!). According to Susan Voisin .. "Wash the chard but do not dry. Remove the center stem from each leaf. Set the leaves aside and chop the stems into small pieces. In a large skillet, sauté the onion and chard stems until softened (about 5 minutes), adding a tablespoon of water if necessary to prevent sticking." I added a splash of soy milk at this stage (second mistake?). Susan goes on to say "Meanwhile, cut the chard leaves into bite-sized pieces. Add them to the pan along with the garlic, reduce heat, and cover. Cook until all chard is wilted. Remove from heat. If any water has accumulated, drain it; then spread chard in bottom of prepared pie pan." I decided NOT to drain the water in the pan (its full of nutrients, I thought!). Well, I'm quite certain that was mistake #3.  Fatfree Vegan, Susan goes on to say "Place tofu and remaining ingredients in a blender, and puree until very smooth. Pour over the chard in the pie pan. Use a spoon to gently open holes through the chard so that the tofu mixture penetrates it. Smooth the top so that tofu layer is even and covers all the chard." ... Well since my blender was broke, I decided to whisk all my ingredients really well and then pour it on the chard. That might have been mistake #4. Given that my recipe was extremely watery, I had to bake the pie for 45 minutes to get anywhere near the coloration that fatfree vegan shows on her website. But after 45 minutes of baking, the center was well set and the top of the pie was nice and crusty. At this point, I remove it from the oven and allowed it to rest for 10 minutes before slicing and serving.

Savory Swiss Chard Pie
My AssessmentNext time I'll try the recipe 'as written' to give it another whirl. 

Veggie Fact of the Day


Swiss Chard is a leafy green vegetable often used in Mediterranean cooking. Chard belongs to the same family as beets and spinach and shares a similar taste profile with a flavor that is bitter, pungent, and slightly salty. 

The leaves are nice and dark green and the stalks and leafy veins vary in color (red, yellow, orange and purple). Chards have been bred to have highly nutritious leaves and some consider Chards to be one of the healthiest vegetables available. 

Swiss Chard are high in Vitamins A, B2, B6, C, E and K and Biotin. Chards are also high in dietary fiber and protein. Minerals include manganese, copper, calcium, potassium and the red stalks are are rich source of Iron. All parts of the chard contain Oxalic acid, which can be toxic when consumed in super high doses (in excess of 600 mg/kg). Chards are a unique source of phytonutrients called betalains. 

In the red stalks, there are at least 9 different betacyanins, at least 19 betaxanthins in the yellow stalks. All these pigments provide antioxidant, anti-inflammatory, and detoxification support. 

April 16, 2012

Kala Channa (Bengal Gram) Curry

I've been on a slow cooker frenzy these past couple of days. I made Dal Makhani over the weekend and then decided that I was going to make my old favorite from my younger days in a slow cooker as well ... Kala Channa Curry.


Kala Channa, or Bengal Gram, is a cousin of the Chick pea, or Garbanzo bean. It is a legume, and super high in protein content, and it is one of the oldest cultivated vegetables.  According to Wikipedia,  7,500 year-old remains have been found in the Middle East. I also found out today (thanks to Wiki) that India is the largest producer of Chick peas in the world - close to 6 million tonnes annually. Pakistan and Turkey, follow as not-so-close second and third, with less than a million tonnes each. As compared to the more commonly found light colored chick peas, the darker Bengal Gram are a great source of zinc, phosphorous, folic acid and protein. They are also very high in dietary fiber and hence a healthy source of carbohydrates for persons with insulin resistance or diabetes. They are low in fat, and what is present in the seed is mostly polyunsaturated. In the US, I've never found a can of Bengal gram .. while the lighter colored Garbanzo bean is everywhere. The dry bean is easily found in Indian grocery stores.  

Prep Time: 8-10 hours in a slow cooker

Ingredients:

  1. 1 cup Bengal Gram (kala channa)
  2. 1 Medium Red onion onion, diced
  3. 1 large tomatoes, diced. 
  4. 4-5 stalks of celery, diced
  5. 2 tbsp Ginger-Garlic paste
  6. 1 tbsp Cumin powder 
  7. 1 tbsp Coriander powder
  8. 1-2 tsp Red Chilli powder
  9. 1 tsp Turmeric powder
  10. 1 cup Vegetable broth
  11. Salt and pepper, to taste
Directions
Wash and soak the beans overnight in ample amounts of water (3-4 times the amount of beans). Put all ingredients in the crock pot and about an additional cup of cold water and cook on high for pretty much the whole day. I set it in the morning before I left for work and it was ready when I got home. As with the dal recipe, the tomatoes, onions and celery will cook down so don't worry about how they're diced. A coarse chop is all that's needed. For the celery, I even chopped up some of the tender leaves and added them to the crock pot. In the evening, I tested the beans to make sure they're done, and tasted for salt. Garnish with pepper, a sprinkle of Garam masala and fresh diced coriander leaves, and enjoy over rice, or sop up with bread. The final dish should be quite soupy. I had it tonight with leftover Turmeric Spice Rice from the weekend. Yumm!

April 15, 2012

Turmeric Spice Rice

Rice, especially Basmati Rice is the most common form of starchy cereal in Indian cuisine. In Northern India, wheat and whole wheat flat bread (Chapati) are used extensively, but rice still remains an important part of each meal. It can me eaten steamed and plain with curries and dals and is often also used as the main course, in the form of pilafs, which may include lentils, beans, vegetables and even meat. I use steamed rice extensively and last night decided to give my steamed rice a little antioxidant boost - the result - Turmeric Spice Rice ... came out exceptional. 

Turmeric Spice Rice
Prep Time: 15 minutes

Ingredients:
  1. 1 cup Basmati rice
  2. 2 tsp Turmeric powder
  3. 10-15 Black Pepper corns, whole
  4. 2-5 Bay leaves, whole
  5. 4-7 Cloves, whole
  6. 2-3 Green Cardamom, whole
Directions:
Rinse rice in ample amounts of water. In a deep stock pot, add rice, with all the spices (and no salt) and bring to a rolling boil.  Cook until rice is done (do a quick bite test!) and then drain the excess water using a colander. As soon as the water is drained, transfer to a serving dish and cover until ready to serve. I served mine last night with Dal Makhani.  

Rice on a rolling boil ...
I'm often asked what I call a rolling boil, so I took a picture :) !!

Note: Here's a trick my husband taught me! I'm a multi-tasker and would often have pasta or rice boiling at the same time as I was making the sauce or curry. Unfortunately, this meant that I would often have it boil over all over the stove top. T taught me to place a wooden spoon across the pan when boiling rice and pasta. Ta-da!! It doesn't boil over. Don't ask me why? or how? I just know it works!!

Herb and Spice Fact of the Day

Turmeric (Hindi: हल्दी) is one of the most important spices in India. 

It is used in practically every dish whether it contains meat, or vegetables, or rice. Depending upon the amount used, it colors the food to a pale yellow, or deep orange. Turmeric has been used in India for over 3000 years and has been shown to have extensive medicinal properties. 

Its active ingredient Curcumin has been tested extensively for its anti-inflammatory and anti-oxidative properties. It is a natural antiseptic and antibacterial agent, useful in disinfecting cuts and burns. Mixed with milk and clarified butter, it is useful in reducing the symptoms of the common cold. Mixed with oils in a thick paste, and applied to wounds, it is useful in wound healing and reducing scars. 

Growing up in India, my grand mother would make potions at home for virtually every ailment and they included turmeric in some form. Curcumin has been explored as a natural painkiller and for its anti-inflammatory, anti-proliferative effects against a variety of cancers.

Note: Curcumin is poorly absorbed in the body but co-consumption of piperine, a natural active ingredient in black pepper,  has been shown to increase Curcumin absorption by as much as 2000%. 

Dal Makhani

So Tony is an Indian food enthusiast who sticks to 2 basic items on an Indian menu ... Dal Makhani (Buttery Black Lentils) and Chicken Tikka Masala. He requested an Indian meal this weekend and in his vocabulary that usually means Dal with Steamed rice and chapatis.

Dal Makhani
Dal Makhani is made with Black Lentils, or Urad Dal. These beans have black skins with a creamy white interior. The whole bean has a strong, earthy flavor mainly because of the black skin and is most often used in this preparation. Split dal, with the skin retained also has a similar strong flavor. The split dal without the skin in my opinion, tastes like mush!

Urad Dal
Unlike most of my other recipes, Dal Makhani takes a few hours of cooking time. Stove-top cooking is not recommended, and pressure cooking is most commonly used. But the easiest fix-it-and-leave-it method is to use a crock-pot or slow-cooker.  I found a recipe online on another blog (Oh Taste n See) and modified it to my own style and taste ….. 

Prep Time: About 6-8 hours in a slow cooker.

Ingredients:
Cucumber & Red Onion Salad
  1. 1 cup whole Urad dal
  2. 1/4 cup Red/Black Kidney Beans
  3. 1 large Red onion onion, diced
  4. 2 large tomatoes, diced. 
  5. 2 tbsp Ginger-Garlic paste
  6. 1 tbsp Cumin powder
  7. 1 tbsp Coriander powder
  8. 1-2 tsp Red Chilli powder
  9. 1 tsp Turmeric powder
  10. 3-5 Bay leaves
  11. 1 cup Soy Milk
  12. Salt and pepper, to taste
  13. 2 tsp fresh Coriander leaves, finely chopped. 

Directions
Wash and soak the beans overnight* in ample amounts of water (3-4 times the amount of beans). You can add a dash of salt here (some people do), but in my opinion it only slows the osmosis of water into the bean and I just use plain water. Put all ingredients, except for the milk, in the crock pot, and about 3 cups of cold water and cook on high for about 5 to 6 hours. The tomatoes and onions will cook down so don't worry about how they're diced. A course chop is all that's needed. Occasionally stir the pot during this time, and add more water if needed. About an hour or so before dinner, add soy milk, stir well and reduce heat to low. Garnish with pepper and Coriander leaves. I served it over Turmeric Spice Rice, and with Chapatis. Alongside, I also served a Cucumber and Red Onion Salad ... thinly sliced cukes and onions, with salt and lemon/lime juice. 


Nik's Reaction: Although he's loved dal-chawal (Lentils and rice) in the past, he wasn't in the mood for it this time. He enjoyed the Turmeric Spice Rice I made, and had some of Mutter Paneer Bhurji with a buttered, rolled-up Chapati.

Tony & Alex's Reaction: Both ate voraciously. I think Alex had 4 chapatis and at least 4 servings of dal-chawal ... teenagers!! Overall, this meal is always a hit with the Coder men!

* I've even made this recipe without soaking overnight and it works just as well if you leave the crock pot on high throughout! 

Mutter Paneer Bhurji

Its hard being the only plant-based eater in the house. No matter what recipe I try, I have left overs, sometimes for 2 or even 3 meals. So I have to sometimes innovate and make-over said leftovers into new dishes. Yesterday morning, I had HH Tofu Scramble, or a modification of it, for my Cheesy Tofu on Toast version. The leftovers served as my side-dish last night, and were transformed into Mutter Paneer Bhurji, which literally translates into Peas & Paneer Scramble

Paneer (Hindi: पनीर) is a fresh cheese common in the Indian sub-continent. There is documentation in ancient scriptures that show it was used as far back as 3000 BC. It is, of course milk-based, and is an unaged, acid-set, non-melting farmer cheese or curd cheese made by curdling heated milk with lemon juice, vinegar, or any other food acids.  Unlike many cheeses in the world, the making of Paneer does not involve Rennet as the coagulating agent, thus making it a lacto-vegetarian vegetarian food. It is often considered a rich source of milk protein in India. It is generally unsalted and takes on the flavors of the spices and vegetables it is cooked with. For a plant-based person, firm Tofu serves as an excellent replacement. 

Mutter Paneer Bhurji
Prep Time: 10 min with leftover Tofu Scramble. 20 minutes with fresh Tofu. 


Ingredients & Directions: Follow the HH Tofu Scramble recipe and set aside. Line a separate skillet with just a small amount of water or Vegetable broth, and add thinly sliced onions and diced tomatoes and just a small sprinkle of salt. Saute until well caramelized. Then add about 1/2 cup of frozen pea and another splash of vegetable broth. Cook until peas are done. Mix in tofu scramble and toss well. Allow the dish to simmer for a couple of minutes to allow the flavors to blend together. Serve with fresh warm Chapatis


April 14, 2012

Cheesy Tofu on Toast

Last week I tried Breakfast Tacos and was reminded of my years in Austin Texas. This weekend I wanted to make something we often made at home in India .... Cheesy Eggs on Toast ..... 

Prep Time: 10 min. or less

Ingredients & Directions: I followed the HH Tofu Scramble recipe, with about double the amount of nutritional yeast so add more cheesy flavor. Just as the scramble was getting done, I added some diced tomatoes to the pan and stirred them in. In a separate skillet, I added a splash of water, salt and red Chilli peppers, and threw in a half of a thinly sliced onion and sautéed it for a couple of minutes. Toast a couple slices of bread (any kind) and top off with a heaped serving of Tofu Scramble, and top it off with sautéed onions. As you can see, I added some salsa on top, but it wasn't necessary at all to enjoy the flavors. Now I didn't have any Daiya (or other non-dairy cheese) at home, so I simply doubled on the nutritional yeast  today. If you have any Daiya cheese at home sitting around, mix in some shredded Cheddar for some traditional cheesy flavor, or add some shredded Pepper Jack to get a little Mexican kick!! 

Happy Eatings ... !
Thanks to the crumbly eggs on top, this dish is best eaten at a table :) If you add cheese to the scramble before removing it from the stove, the cheese melts, to make it nice and gooey .. and you can eat it on the couch ;-) 

For the Tofu-averse, you can most definitely make this with eggs as well!! Enjoy!! 

April 13, 2012

TVP Keema Mutter

This Friday evening was meant to be chilled out and relaxing, until I got it into my head that I wanted to eat Fresh Home made Chapatis. Of course, if I was making chapatis, I needed a curry, or a Subzi (Hindi: सुब्ज़ी) curry) to go along with it. Since my chapati endeavor was the first in over 20 years, I decided to make an easy one. 

TVP Keema Mutter w Chapati
Prep Time: 15 min

Ready to Heat & Eat TVP
Ingredients:
  1. 1/4 cup Vegetable Broth
  2. 1/2 cup Peas
  3. 1 Pack of Yves Meatless Ground (TVP)
  4. 1 tbsp Ginger-Garlic Paste
  5. 2 tsp Cumin Seeds
  6. 2 tsp Coriander Powder
  7. 1 tsp Turmeric
  8. 1-2 tsp Red Chilli Powder, optional
  9. Salt and Pepper, to taste
  10. 1 small red onion, thinly sliced, and drizzled with lemon/lime juice. Salted to taste. 
Directions:
Line a skillet with about 1/8 cup vegetable broth and bring to a boil. Add Ginger-Garlic paste and all spices. Cook for a few minutes and add peas, frozen or fresh, both work just fine. Cook for a few minutes until peas begin to cook down. Add in the TVP, either the ready to eat variety I used today, or reconstituted TVP such as Bob's Red Mill which is more commonly found brand in grocery stores. Toss everything really well together, add a splash of vegetable broth, if necessary and turn heat to low. Cover and simmer for 5-10 minutes to allow the spices to cook and all the flavors to meld together. Serve garnished with fresh red onion as a crunchy side, and fresh, hot off the skillet Chapati. 

This was was one of my dad's favorite foods ... so this one's for you Daddy, wherever you are!! Miss you everyday .... !!

Daddy with li'l Nik (7 months)


Chapati (Roti) - Indian Flat bread

Some days are just meant for an old relaxing meal and a chilled out evening. Yet, this afternoon I got it into my head that I wanted to make some fresh chapati (roti). Now for the uninformed, please note, that this is in no way shape or form a relaxing meal or a chilled out evening. Although my plans for the evening included laying in bed with my Nook book ... here I was jumping head first towards something that I have not tried doing in ... oh maybe 20 years or so!! Yup ... I'm that old and I'm that lazy!! In the past 20 years I have never once had the urge to make fresh chapatis at home. Unless someone else has lovingly made the dough, and the chapatis, I have not eaten chapatis during this time as well. Some might think that's a bit messed up for an Indian, and I'm okay with that ... :)


Chapati (Hindi: चपाती) is an unleavened flat bread (also known as Roti) eaten at practically every meal in India. It is the most common form of wheat consumption in the Subcontinent. The dough is firm and contains only whole wheat flour and water. Occasionally, in few households, salt and/or oil may be mixed into the dough. Small portions of this firm dough are rolled out using a rolling pin and the chapati is then cooked on a flat pre-heated and dry skillet known as a Tava (Hindi: तवा). In some regions, it may be partly cooked on the skillet and then put directly on a high flame, which makes it blow up super quick. This air-filled bread, often called Phulka (Hindi: फुल्का) cooks quickly, as the hot air on the inside promotes rapid cooking.  Some people like to butter their chapatis, but I have honestly always preferred it plain. Sometimes, a ball of dough may be stuffed with spiced mixtures (potatoes, onions, cauliflower, cheese, and even cinnamon sugar). This stuffed ball of dough is then carefully rolled out and cooked with ample amounts of butter to make Parathas (Hindi: परांठा). 

Ingredients:
  1. 1 cup whole wheat flour, and more for dusting the rolling pin and cutting board. 
  2. Tap water, as needed
  3. A flat, non-stick skillet, or a seasoned cast iron pan.
Directions:
To make the dough, measure out the flour into a large mixing bowl and using your hands, slowly add water, a few splashes at a time, and knead it into the flour. I used a KitchenAid Stand Mixer with the dough hook attachment as I'm not one to get my hands dirty ;-)


I started out by adding just a splash of water to the flour and added more water as needed until the flour was soaked well and balled up together.  


Here's how I remember my mom checking the dough for the right consistency - it should not stick to your hand when you try to lift it out of the bowl, but should feel moist, and not dry, to touch. This dough can be stored refrigerated for at least 3-4 day. According to my sister-in-law, it may darken in color over this time, but its still good. 


To make chapatis, I used my large rectangular wooden cutting board, as I don't have a traditional Chakla (Hindi: चकला) - which is a round flat-topped utensil, often made of marble. The weight of the marble makes it stable and the cool temperature of the marble helps the chapati move easily while rolling, without sticking. Take a small ball of dough, roll it in some dry flour, dust the rolling surface with more flour and roll away. You may need to turn the ball a couple of times, and dust if needed to prevent sticking.  


Unlike pastry, chapatis require a rather light touch with slight pressure. In fact, the most experienced cooks make it so gracefully that the dough moves around in a circle while being rolled. Mine, with 20 years of no practice came out halfway decent. Make sure while rolling that the thickness is as even as possible. Traditionally, the dough is rolled out to about ~2 mm thickness, or even thinner of you are that talented.  


Preheat a flat, dry skillet on medium high heat. Carefully transfer the rolled out chapati and slap it onto the skillet. Slapping it on ensures that there are no trapped air bubbles between the dough and the skillet. The rule of thumb, according to my mom, is that you should only turn a chapati 3 times during the cooking process.  Once it is placed on the skillet, wait until the top surface begins to look dry and then turn it over. Once turned over, and the surface begins to blow up, ball up a clean, dry dish rag and used to press down gently on the chapati as it cooks, to help it balloon up with steam. This cooks the underside, then turn it over and do the same on the other side ... and voila ...  


After all these years of living in the United States, I love the smell of fresh baked bread and cakes and vanilla extract but I've got to say ... my house smells absolutely heavenly tonight. There is no greater aroma than one that reminds you of carefree summer days and Mommy's cooking!! I promised myself tonight I will never be lazy about making Chapatis again!! I was an idiot all these years!! I'm not winning any prizes for rolling out the perfect circles just yet ... but they were home made and they were fresh ... Chapatis!! Aaah!!

A basket of Chapatis
Note: If you want to serve a basket of Chapatis with a meal, its best to butter each one lightly on one side, and wrap them as they come off the skillet. A clean dish towel works well because its nice and thick and holds the warmth better than a cotton napkin. Keeping the chapatis wrapped during cooking and during dinner helps keep them warm and also prevents them from drying out halfway through the meal.